We had the Weathering Vs Metallic group build the 1st half of this year, which was a GB based on final finishing instead of kits. The GB's got a pretty good response and members are actually learning new stuff from it.
Hence, we are now doing something similar again: Diorama Group Build 2011 (DGB)
As its name suggest, this GB focus on various diorama building n construction. Members are encourage to think n share of ways to recreate terrains and all the small props we see in real life. Besides that, the planning of overall layout, and story telling will also be an important part of this GB; which is a part often overseen by modelers.
Again, this GB doesn't focus that much on individual mecha/character building n modification. Instead, the construction n planning of the entire layout for storytelling is the main purpose of this GB.
Official GB start date*Begins*:
- 1 july ~ 11 nov ( 4 months )
Objective:
- trying out on diorama
- learning how to build diff types of diorama terrain
- base or diorama is equally important as the kit it self
Signature Banner (Designed by Zero1st):
Wednesday, July 6, 2011
ZeroGunz's Group Builds (2nd Half of 2011) - Part 2
Another one GB currently going on is the ZeroG-SMM Maschinen Krieger Groupbuild 2011 (MaKGB).
This is a cross forum group build that take places in ZeroGunz (http://www.zerogunz.com/) and Scale Model Malaysia, SMM (http://z12.invisionfree.com/ScaleModelsMalaysia/index.php?).
As its name suggest, this is a group build of Maschinen Krieger (Ma.K) kits.This series is not as mainstream as Gundam n such. However, worldwide it has gatherquite a number of followers since its initial appearance in Hobby Japan. Currently Wave n Hasegawa have "adopted" many of Nitto, the original company that release this series' kits, products. With their higher marketing power n reputation, let's hope more people will know about this series. At least now it's a hot topic amongst few of us in ZeroGunz forum.
Duration: 14 July 2011 - 15 November 2011
Final showdown: Last week of November (which is 26 November 2011)
Venue: ICW
Signature Banner (Designed by JuliusLim):
This is a cross forum group build that take places in ZeroGunz (http://www.zerogunz.com/) and Scale Model Malaysia, SMM (http://z12.invisionfree.com/ScaleModelsMalaysia/index.php?).
As its name suggest, this is a group build of Maschinen Krieger (Ma.K) kits.This series is not as mainstream as Gundam n such. However, worldwide it has gatherquite a number of followers since its initial appearance in Hobby Japan. Currently Wave n Hasegawa have "adopted" many of Nitto, the original company that release this series' kits, products. With their higher marketing power n reputation, let's hope more people will know about this series. At least now it's a hot topic amongst few of us in ZeroGunz forum.
Duration: 14 July 2011 - 15 November 2011
Final showdown: Last week of November (which is 26 November 2011)
Venue: ICW
Signature Banner (Designed by JuliusLim):
ZeroGunz's Group Builds (2nd Half of 2011) - Part 1
Currently in ZeroGunz forum (http://www.zerogunz.com/), while Weathering Vs Metallic GB, and Femme Fatalle GB have come to an end, there are more group builds coming.
One of them would be "Kobayashi Group Build (KGB)".
This is a group build of kits being modified based on inspiration by works by the great master Kobayashi. Not necessary to recreate what he's drawn or designed, just build something inspired by him. In a nutshell, it would be a kit where people first see it will think it's from Kobayashi.
Commencement/Dateline :
15th June 2011 till Bakuc 2011
For more information n wips of the group build pls visit: http://forum.zerogunz.com/viewforum.php?f=115
Signature Banner (Designed by Phoon):
One of them would be "Kobayashi Group Build (KGB)".
This is a group build of kits being modified based on inspiration by works by the great master Kobayashi. Not necessary to recreate what he's drawn or designed, just build something inspired by him. In a nutshell, it would be a kit where people first see it will think it's from Kobayashi.
Commencement/Dateline :
15th June 2011 till Bakuc 2011
For more information n wips of the group build pls visit: http://forum.zerogunz.com/viewforum.php?f=115
Signature Banner (Designed by Phoon):
Monday, July 4, 2011
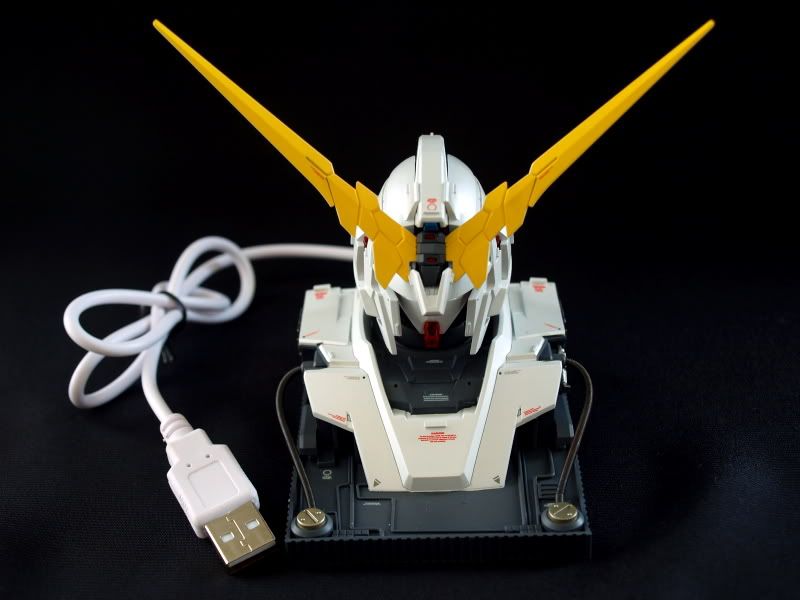
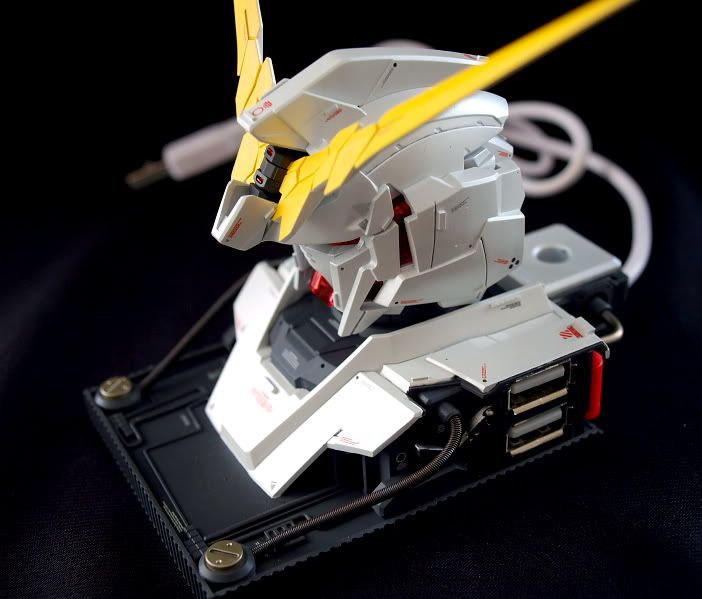
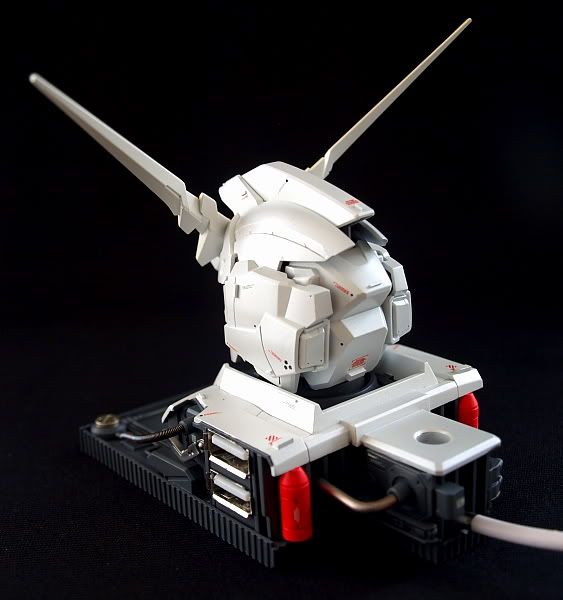
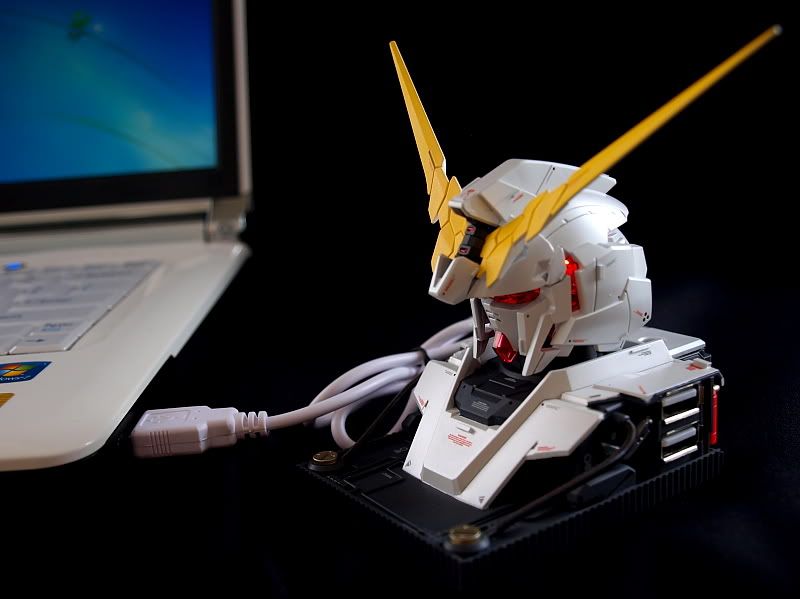
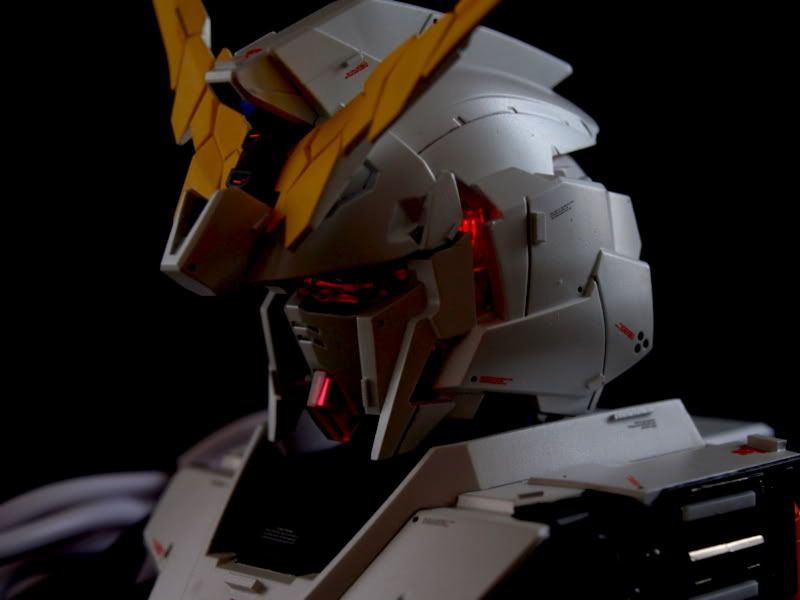
1/48 Unicorn Head - USB Hub
This is a kit built for Ebasenet (http://www.ebasenet.com/) Head Group Build 2011.
The basic concept is to combine these two together:
Yes, am making a unicorn head into a 4 way USB 2.0 Hub.
*********************************************************************************
So, generally, as expected, there's not much of an action pose :p.
Color: Basically all Gaianote color. The white, like the previous unicorn i did, also knowing the pearl effect will magnify any errors on the surface, I did a flat white with rougher pearl as base coat. After that, I use the finest pearl as finish coat. The effect turns out to be pretty good; at least isn't too much outta my expectation.
Modification: Besides adding in the USB hub, basically all i did was just adding some minor details n some spare parts to cover up places I had sawed off. This is also the main reason why i could do it in quite a short period of time
Well, the thing I afraid the most is whether the hub actually is working or not, after all the cutting, redirecting of wires, changing of LED, masked for spraying of paint etc. Luckily all 4 ports r doing fine.
Overall, this is a pretty fun project, didn't provide much problem as i expected. Hope u guys like it:)
Friday, June 24, 2011
MetalBox Metal Boy Series - SD Getter
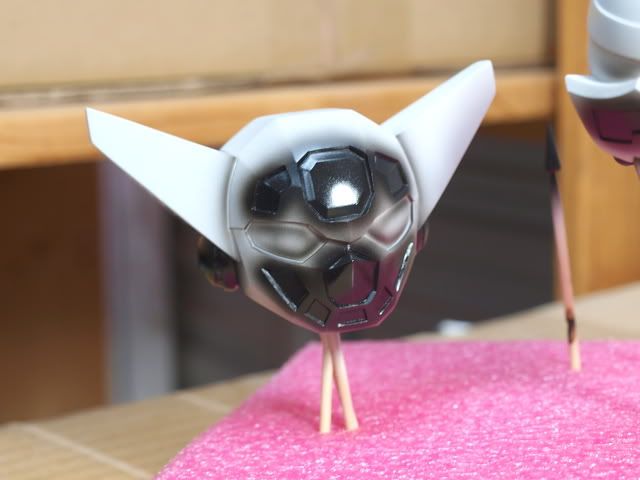
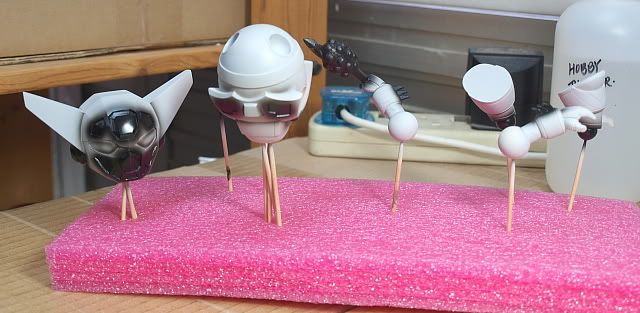
Actually started working on this kit quite a while ago, very simple kit, with total of 6 parts, original Metal Box kit high quality resin. Supposed to be a very easy n stress free project before I start something heavier for year end project.
However, it has taken more time than I expected.
This is mainly because, again, I had initially treated this like it's an injection kit. Looking at it, I was very ambitious, thinking of making it to look like a metal/chogokin kinda finishing. However, after a few rounds of sanding, aside from the normal removing mold line n such, and priming, i realised to achieve a metal-like finishing, probably it would take me a blurdy month just for sanding n surface treatment.
Basically, I have no idea on how to go about doing a log or a wip for this. Have loads of photos, but majority of them r just photos of sanding, primed, visible unevenness yet to be tackled, sanding again.....
Quality Check standard lower one level: result? I m starting on painting now.....
Just sprayed black on areas with metallic color later. Metallic color would be silver, titanium, dark iron/gun metal.
The eye n face part would be black --> silver --> clear green. These would be the only part that will be in gloss. (Oh yeah, just remembered, due to i m not going to tackle all surface smoothness, instead of gloss finish which is very unforgiving for mistakes, i have decided to go for flat finishing)
Huhu, log of a lazy modeler; one who is good in finding excuse for easy way out :p
However, it has taken more time than I expected.
This is mainly because, again, I had initially treated this like it's an injection kit. Looking at it, I was very ambitious, thinking of making it to look like a metal/chogokin kinda finishing. However, after a few rounds of sanding, aside from the normal removing mold line n such, and priming, i realised to achieve a metal-like finishing, probably it would take me a blurdy month just for sanding n surface treatment.
Basically, I have no idea on how to go about doing a log or a wip for this. Have loads of photos, but majority of them r just photos of sanding, primed, visible unevenness yet to be tackled, sanding again.....
Quality Check standard lower one level: result? I m starting on painting now.....
Just sprayed black on areas with metallic color later. Metallic color would be silver, titanium, dark iron/gun metal.
The eye n face part would be black --> silver --> clear green. These would be the only part that will be in gloss. (Oh yeah, just remembered, due to i m not going to tackle all surface smoothness, instead of gloss finish which is very unforgiving for mistakes, i have decided to go for flat finishing)
Huhu, log of a lazy modeler; one who is good in finding excuse for easy way out :p
Monday, June 20, 2011
I'm Coming Home
Yes, I still think Diddy's "Coming Home" is one of the worst rendition in recent months. J Cole's lyrics's still ok, but the rapping by Diddy really suck big time.
Oh, yes, I'm bias. For being a fan of Holly Brooks/Slylar Grey; I think the song (Or part of the song, the melody done by Skylar) deserves a better treatment. As a result of such bad redition, it gives the impression that this song is "incomplete" and leaves a strong urge in me to find a so-called "complete version: I was searching the net for at least a demo verysion done by Skylar herself.
Unfortunately, unlike another of her brilliant mega hit song "Love the way u lie", seems like she hasn't done any complete version of this song. The unfulfilled hunger got me dig in deeper, to somewhere usually i dont really fancy: fan-made version.
Surprisingly, there'r a few that caught my ears; despite that might because of I was getting a little desperate in searching. Here, I would like share what I've found with a my two-cents-worth of opinions. Sit tight n enjoy yourselves:
1. Jenna Anne - Though the lyrics is not really my cup of tea, I think the lyrics doesn't goes well the the original song, I think the melody fits very well with Skylar's chorus. Yes, it does fit very well, as if the song should be this way if it's written (Of course, if Skylar would have written it, her version would be slightly darker.)
Oh, yes, I'm bias. For being a fan of Holly Brooks/Slylar Grey; I think the song (Or part of the song, the melody done by Skylar) deserves a better treatment. As a result of such bad redition, it gives the impression that this song is "incomplete" and leaves a strong urge in me to find a so-called "complete version: I was searching the net for at least a demo verysion done by Skylar herself.
Unfortunately, unlike another of her brilliant mega hit song "Love the way u lie", seems like she hasn't done any complete version of this song. The unfulfilled hunger got me dig in deeper, to somewhere usually i dont really fancy: fan-made version.
Surprisingly, there'r a few that caught my ears; despite that might because of I was getting a little desperate in searching. Here, I would like share what I've found with a my two-cents-worth of opinions. Sit tight n enjoy yourselves:
1. Jenna Anne - Though the lyrics is not really my cup of tea, I think the lyrics doesn't goes well the the original song, I think the melody fits very well with Skylar's chorus. Yes, it does fit very well, as if the song should be this way if it's written (Of course, if Skylar would have written it, her version would be slightly darker.)
Thursday, June 16, 2011
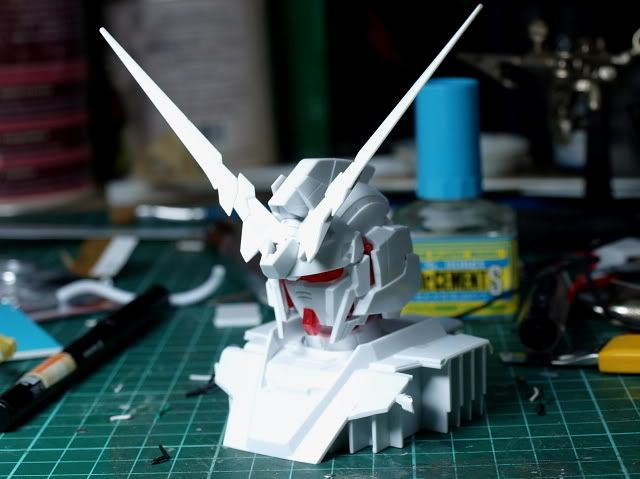
Unicorn Head WIP
Unicorn Head WIP #1
One day, I was just thinking what happen when these 2 combined?
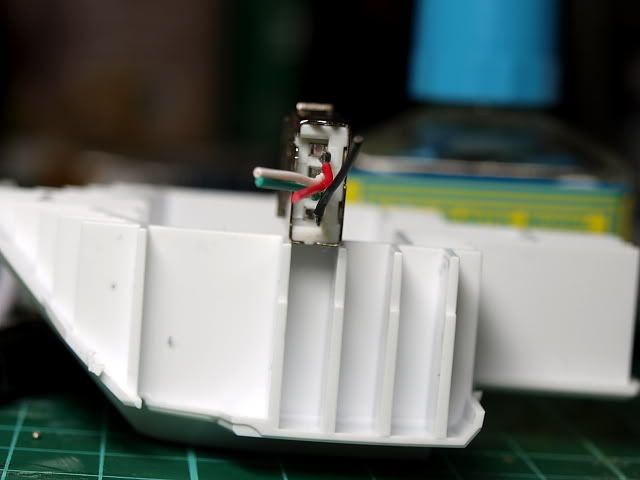
Was deciding how the USB female port should be placed, either horizontal or vertical....
Test fit. Realised I need to sand down one of the inner wall n add some pla plate to fill up some of the empty space. Finally it fits. :)
Just add some pla plate to fill up gaps in between the 2 inlet. Later will add more details.
***********************************************************************************
Circuit board time.......
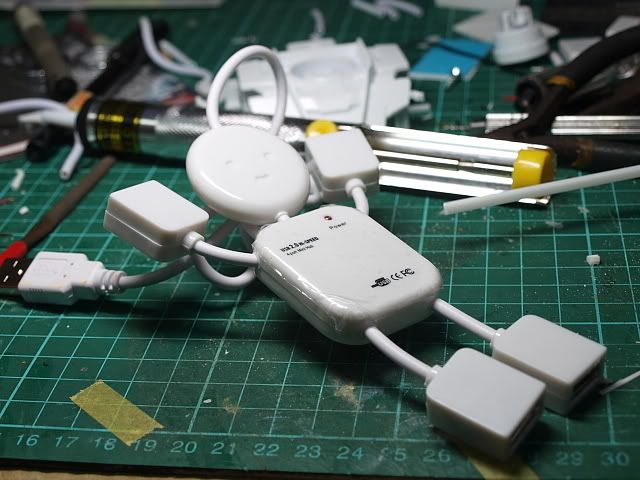
Mr Lelo is looking good... (I can't help but give him a name... Pretty cute USB hub....)
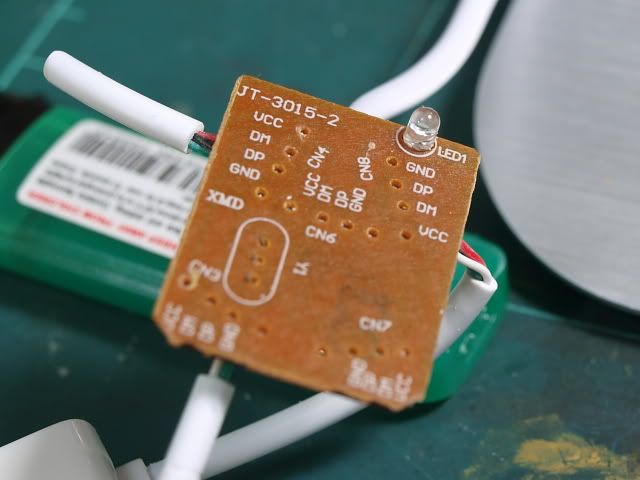
Time to strip the bugger off. Muahahahahaahah...... The circuit board is smaller than I expected, which is a good thing.
Try the circuit board. It fits so well that it really surprised me! Overall just need to chop off 2 parts and the entire circuit board fits nicely into the inner chest.
The USB hub comes with a small light, lit by an LED. The light source is extremely weak and it's in green color. So weak I even have hard time to capture it using camera. Since the psycho frame color of the Unicorn is red, I will change the LED to a red one.
Ok, LED changed. Now check whether the circuit board still working or not. This is because Red LED n Green LED have different voltage, n since I didn't change the resistor on the circuit board, is better I double check (Although the chances of frying the circuit board is slim because 1) Red LED uses lesser voltage than green ones, meaning less burden for the resistor. 2) although they use different voltage, the difference is basically very small, within the variantion of 1V)
I tested the board by connecting all the ports to an USB mouse. Yes, everything's fine, the mouse optical lens is working!!!!
Now test on the head; the light seems a little stronger than I would like it to be. Later will find ways to make it dimmer.
***********************************************************************************
Installation Process
Basically since it's very easy to damage the circuit, I decided to seal up the base before spraying paint. Hence I gotta think of the easiest way for assemble.
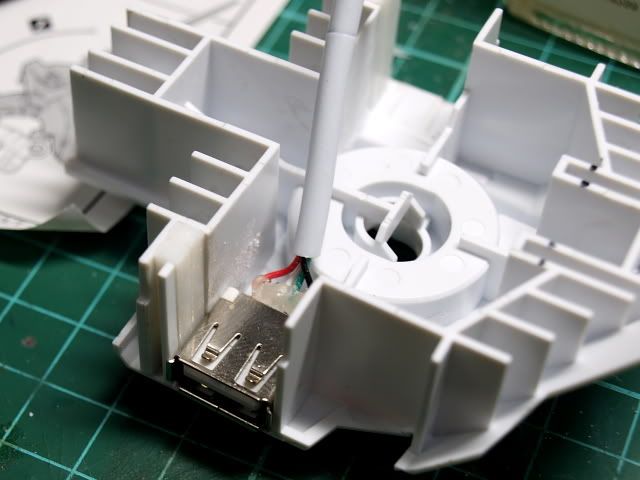
Drill holes on the neck part for the wire to go thru into the head.
Seems like everything's fine. I m luckier than I thought :p
**********************************************************************************
More or less is done. Next step would be painting....... (To be continued. Hopefully I m not too lazy to snap photos.....)
One day, I was just thinking what happen when these 2 combined?
**********************************************************************************
45minutes later.........
Snapfited the head: Looks smaller than I expected, but overall build is pretty good; almost 90% similar to MG.
Put the base upside down, it's pretty spacious where a small circuit board should have no problem hiding inside.
Finally decided to line them up horizontally. So it's time for some chopping n sawing.....
Test fit. Realised I need to sand down one of the inner wall n add some pla plate to fill up some of the empty space. Finally it fits. :)
Just add some pla plate to fill up gaps in between the 2 inlet. Later will add more details.
***********************************************************************************
Circuit board time.......
Mr Lelo is looking good... (I can't help but give him a name... Pretty cute USB hub....)
Time to strip the bugger off. Muahahahahaahah...... The circuit board is smaller than I expected, which is a good thing.
Try the circuit board. It fits so well that it really surprised me! Overall just need to chop off 2 parts and the entire circuit board fits nicely into the inner chest.
The USB hub comes with a small light, lit by an LED. The light source is extremely weak and it's in green color. So weak I even have hard time to capture it using camera. Since the psycho frame color of the Unicorn is red, I will change the LED to a red one.
Ok, LED changed. Now check whether the circuit board still working or not. This is because Red LED n Green LED have different voltage, n since I didn't change the resistor on the circuit board, is better I double check (Although the chances of frying the circuit board is slim because 1) Red LED uses lesser voltage than green ones, meaning less burden for the resistor. 2) although they use different voltage, the difference is basically very small, within the variantion of 1V)
I tested the board by connecting all the ports to an USB mouse. Yes, everything's fine, the mouse optical lens is working!!!!
Now test on the head; the light seems a little stronger than I would like it to be. Later will find ways to make it dimmer.
***********************************************************************************
Installation Process
Basically since it's very easy to damage the circuit, I decided to seal up the base before spraying paint. Hence I gotta think of the easiest way for assemble.
Seems like everything's fine. I m luckier than I thought :p
**********************************************************************************
More or less is done. Next step would be painting....... (To be continued. Hopefully I m not too lazy to snap photos.....)
Subscribe to:
Posts (Atom)