Tuesday, November 1, 2011

Diorama: Laser Pointer II

Update: 1st November 2011

This is a brief record of how i m going to make the laser pointer:

Image
This is the brand i use, can be easily find in the mraket. Cost is around RM4~RM8.


Image
tear away the sticker n the seamline is revealed.


Image
Image
Use a plier, slowly pull out the top part.


Image
This is the circuit board. The whole thing includes a UV light LED, and a laser pointer.

Image
Image
As u can see, the part with the spring is actually connected to the negative side of a battery; while, like many other torch light design, the positive is actually the entire metal part of the device that our hand is holding. the electric current is actually transfer via the metal body of the laser holder n the metal part at the front.

*Note: the switch is actually a contact switch n not an on/off switch which i made a mistake while i edited the photo. contact switch means, u press the switch, the circuit complete n there's current. But once u release, it automatically cut off.


Image
Image
I realised that the so-called "laser" is actually a focused LED light. The lens inside it has made the redius of the light source become very small. As a result, it looks like one point. In fact, when u move the source further away, the dot will become bigger.
It's not laser afterall....
The second photo shows the lens that's initially set inside the metal tube at the front. I accidently make the the thing out. I was trying to solder the wire onto the metal part, hence i heat up the part . As a result, everything inside popped out (one wasted T_T)


Image
Study a bit on the circuit board; it's a fairly simple one.

Image
Cut off the UV LED. Besides that, i have decided not to mess with the contact switch, but instead, i find creating a bypass/loop is much easier.

Reason for doing so it, the transistor n LED inside is extremely sensitive. Without any protection, when i connect it to a current, thru my skin, very small current exist n cause an extremely small short circuit. very small till normally we dont even notice it. But here, it will immediately burn the laser pointer.

Image
solder one side, with a brass rod from a single core wire.

Image
Done! Huhu.

Note: again, the board is so sensitive, when i was soldering n i wasn't careful n made mistake, keep on redoing on it the heat will also burn it...

-sweat- -sweat- -touched- -sweat- -touched- -sweat- -touched-


Image
solder the negative.


Image
wrap it first, just in case anything happened. protection is important.


Image
now the positive.


Image
Done.

Yes, it's not the best looking laser pointer, in fact, looks like a mummy sausage. But as long as it gets the job done i m ok. Besides that, everything is 80% hidden, so i couldn't care more.....


This is all for now..... i hope i wont get bashed as bad as my previous stick boy post.... afterall, electric n light can be quite usual in diorama building....


C&C welcome -bow-

Diorama: Laser Pointer

This is actually a diorama i had the idea for almost 3 years. The concept is a very comic like diorama: A GM is trying to sneak into enemy base to plant some bombs. However, whenhe touch down, he realised there r already 10 guns pointed at him.

The guns will be represented by laser pointer light.

Initially, I was trying to create some movement too, just that the unstable hand we have when we r holding something. I've tried numerous methods, with vibrating motor, spring etc. However, in the end, decided to call it off because of a few issues that i cannot solve: the main thing is the randomness of each laser point.

So basically, this is how the diorama looks like (drawing):

**********************************************************************************

Kit: MG 1/100 GM Kai (Bash with the foot part of an MG GM Custom)
Base: 4 pcs of Kotobukiya Mechanical Chain base (Er… Well, at least one of them is genuine Koto base….)

When the GB first started, we had some discussion in the thread about the difference of a diorama n a vignette: the size, the story telling, interaction among different elements in the whole piece etc. From the discussion, if there’s of any importance, I guess what I m doing here is considered more of a vignette than a full diorama.


Yes, there’s only 1 kit.


Concept: It’s a scene, a frozen scene of awkwardness. A GM or a group of GMs was trying to infiltrate a Zeonic base/hanger to plant some time bomb. It’s during night time, or time that the hanger/base supposed to have the least guard. So he dropped, and second before he’s going to touch down, he realized there’r 10 laser pointer on all over its body. Yes, a troop of Zakus are aiming their weapon at this shocked n stunned visitor.
This is absolutely awkward, n embarrassed, well if the GM still have it to feel embarrassed. Time freezes, air freezes, everything’s frozen.
It’s like u r just trying to convince your wife u didn’t buy anymore gunplay. But while telling lies after lies, n when she’s almost about to believe u, a resit of Graffiti Toys showing RM700 for a PGOO suddenly slip of your pocket and falls face up onto the ground. The word “RM750. Thank you. Please come again” is clearly visible to both of you…..

Yes, it’s something similar to that. The moment of total silence before all hells break loose…..


*************************************************************************


Image
This is how it’s going to look like: Koto chain base as wall n ground. One GM’s hanging in the middle, while 10 laser pointers r pointing on its body.


Image
This is a brief description on how the laser pointers r going to be hidden.
The bad part about this arrangement is the distance between the GM n the laser pointers in relative to the height of both objects. Seems like I m going to have some tough time adjusting the location of the pointers since the angle is pretty big.

Sorry, since I m still rushing the project, no photographs is being taken….. -no2-


Name/Title:

Currently I m still struggling with the title of this dio/vignette.
There r 3 types of direction I could go for for this dio:

1. Conventional title:
Actually I m not so keen of this…… yeah let’s forget about it…..BORING…..
“ Ambush”
“Lamb Among The Wolves”


2. Conversation:
I m thinking of using a conversation as the title. Something like a box in a comic. This is a more indirect approach to make the viewer understand about the whole story. However, am still struggling in a very strong punch line….

The bad part about conversation is, in this awkward moment, the GM should be frozen in shocked, n speechless. Saying something might be a slight moment away. Which is think the tension’s already broken.


“… yes, I’ve touched down…. No, seems like they don’t have the habit of sleeping early…”
“I wont be joing the karaoke session later. I say I won’t join. DON’T YOU GUYS UNDERSTAND!!!?”
“ Er… hi, if I say I m actually Santa Claus, U think u ll let me go?”


3. Caption:
This is the one I favor. Again something like a comic strip, more of a one frame comic strip like “The Far Side”. The caption explain the situation, n the humor is slipped thru from here.

“ For a second, Chuck was considering whether the joke about the cow in the bar would ease the tension….”
“In the tensed air, Chuck suddenly remember Listen to the rain. The song his mother always sing when he did something wrong….”


Guys, this is generally what I have in mind currently. I would really appreciate if u can help me out in the brainstorming of the title. All sort of outta the box ideas are welcome!!!!!!!


Crazy Stupid Weirdo Freak Suggestions Are WELCOME!!!!!


-bow- -bow- (for a wip without even 1 single photo....)

Friday, July 8, 2011

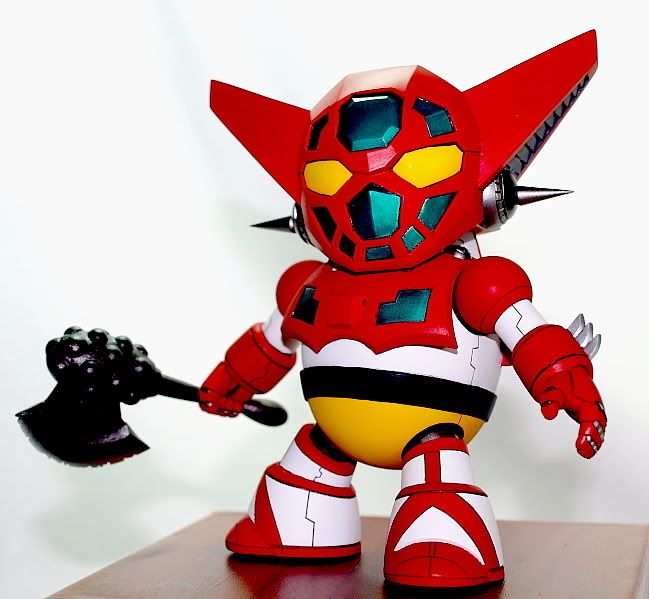
MetalBox (Metal Boy Series) - SD Getter

Last year's visit to Japan's Wonder Fest Summer 2010 proved to be a deep cut to the wallet. For a Malaysian who's not used to original resin and its price range, it's such a mixture of pleasure & pain visiting that event, especially, when compared to injection kits which are 2,000yen~4,000yen, original Japanese cast resin generally cost around 9,000yen~15,000yen.

Hence, I didn't get many of those "1 day WF limited licensed" resin kit. In fact, as a cheapo, what I got was this kit that's selling all year long n got a special discount during WF. It's like exactly opposite of most people that visit WF.

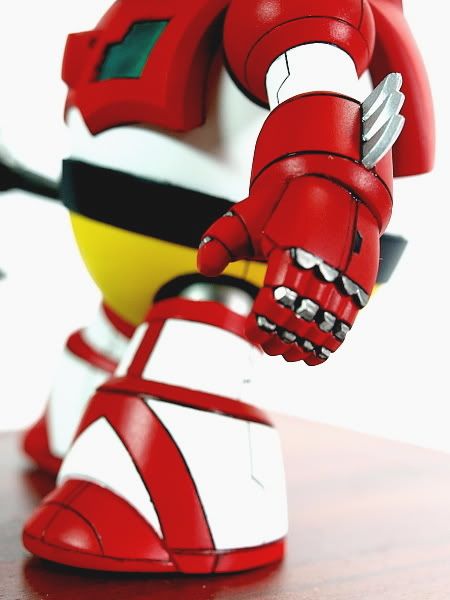
This is a kit by MetalBox which I really love. An SD that posses egg shape. The cast is very good, all details are there, relatively not that much of extra flashes n "sand hole" (air trapped in the resin), and most importantly, which is one of the hardest part in resin kit to tackle, the panel lines r pretty clean. Yes, majority of the panel lines r above average standard.

Again, photos first, sharing of work later:


************************************************************************************
Blue Background


**********************************************************************************

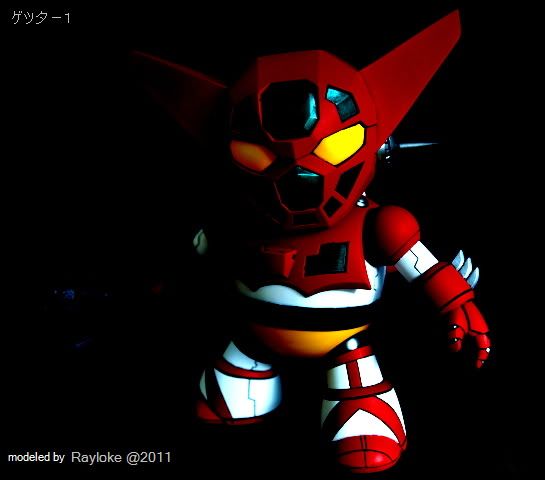
Some Hand-Itchy, so called "Special Effect" artwork (Actually I just tweak with gamma, brightness, contrast, sharpness, n a little bit of color)

Looks a little bit like 3D computer graphic....


***********************************************************************************

Again, when I was working on this kit, again, it took me some time to shift from the mentality of dealing with an injection kit to a resin kit. For resin kit, especially due to the mold is actually soft compared to a metal injection plastic mold, there'r quite a lot of "flaw" in the eyes of injection kit builders, but are pretty much acceptable in resin kit.

This is especially enhanced in dealing with mecha, or any metal/solid subject that has very sharp n crisp edges, and straight lines. Organism is better; in fact i kinda like the slight round n uneven edge of an resin kit compared to a very rigid n uniformed ones in injection kits.

Besides that, was trying to make a glossy finished kit that looks like chogokin kit. However, due to many surface finishing issue that I didn't tackled well, in the end, use flat to help cover.

Overall, this is not a kit i m most proud of, besides the fact that I had quite a good time working on it.

Wednesday, July 6, 2011

ZeroGunz's Group Builds (2nd Half of 2011) - Part 3

We had the Weathering Vs Metallic group build the 1st half of this year, which was a GB based on final finishing instead of kits. The GB's got a pretty good response and members are actually learning new stuff from it.

Hence, we are now doing something similar again: Diorama Group Build 2011 (DGB)

As its name suggest, this GB focus on various diorama building n construction. Members are encourage to think n share of ways to recreate terrains and all the small props we see in real life. Besides that, the planning of overall layout, and story telling  will also be an important part of this GB; which is a part often overseen by modelers.

Again, this GB doesn't focus that much on individual mecha/character building n modification. Instead, the construction n planning of the entire layout for storytelling is the main purpose of this GB.

Official GB start date*Begins*:
- 1 july ~ 11 nov ( 4 months )

Objective:
- trying out on diorama
- learning how to build diff types of diorama terrain
- base or diorama is equally important as the kit it self


Signature Banner (Designed by Zero1st):

ZeroGunz's Group Builds (2nd Half of 2011) - Part 2

Another one GB currently going on is the ZeroG-SMM Maschinen Krieger Groupbuild 2011 (MaKGB).

This is a cross forum group build that take places in ZeroGunz (http://www.zerogunz.com/) and  Scale Model Malaysia, SMM (http://z12.invisionfree.com/ScaleModelsMalaysia/index.php?).

As its name suggest, this is a group build of Maschinen Krieger (Ma.K) kits.This series is not as mainstream as Gundam n such. However, worldwide it has gatherquite a number of followers since its initial appearance in Hobby Japan. Currently Wave n Hasegawa have "adopted" many of Nitto, the original company that release this series' kits, products. With their higher marketing power n reputation, let's hope more people will know about this series. At least now it's a hot topic amongst few of us in ZeroGunz forum.

Duration: 14 July 2011 - 15 November 2011
Final showdown: Last week of November (which is 26 November 2011)
Venue: ICW

Signature Banner (Designed by JuliusLim):

ZeroGunz's Group Builds (2nd Half of 2011) - Part 1

Currently in ZeroGunz forum (http://www.zerogunz.com/), while Weathering Vs Metallic GB, and Femme Fatalle GB have come to an end, there are more group builds coming.


One of them would be "Kobayashi Group Build (KGB)".

This is a group build of kits being modified based on inspiration by works by the great master Kobayashi. Not necessary to recreate what he's drawn or designed, just build something inspired by him. In a nutshell, it would be a kit where people first see it will think it's from Kobayashi.

Commencement/Dateline :
15th June 2011 till Bakuc 2011

For more information n wips of the group build pls visit: http://forum.zerogunz.com/viewforum.php?f=115


Signature Banner (Designed by Phoon):

Monday, July 4, 2011

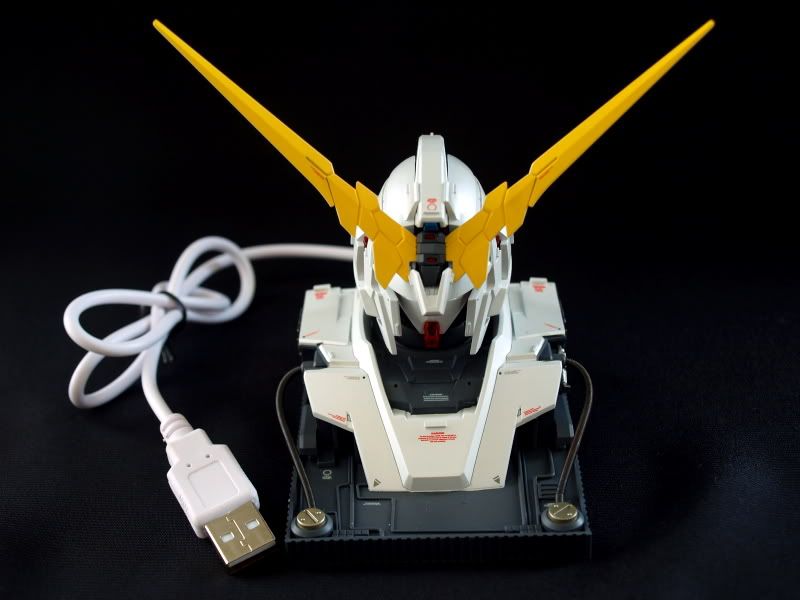
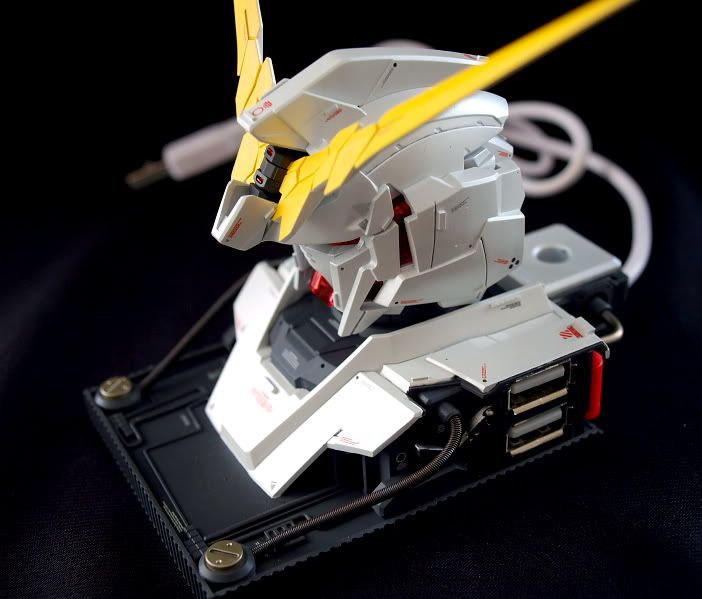
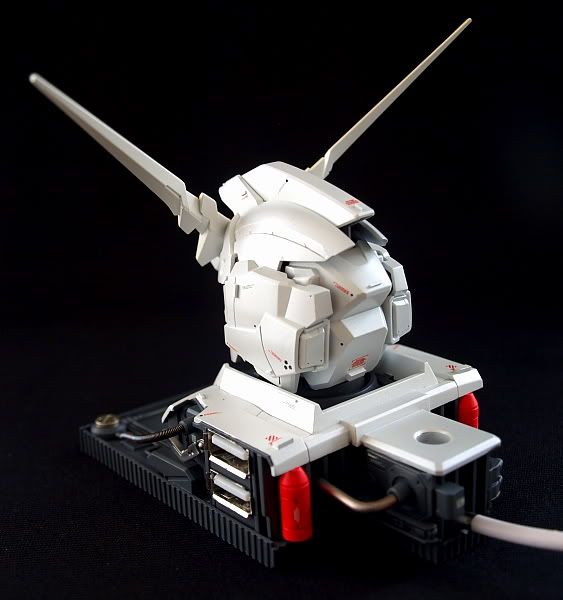
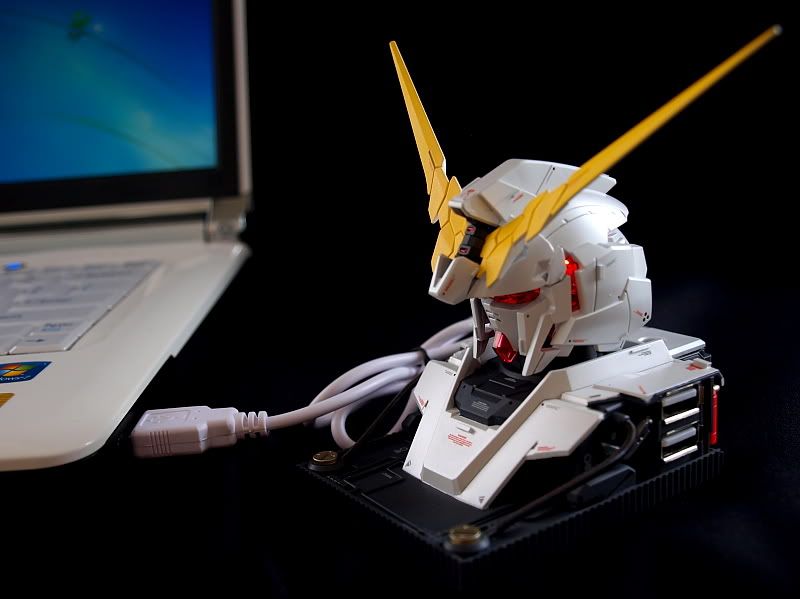
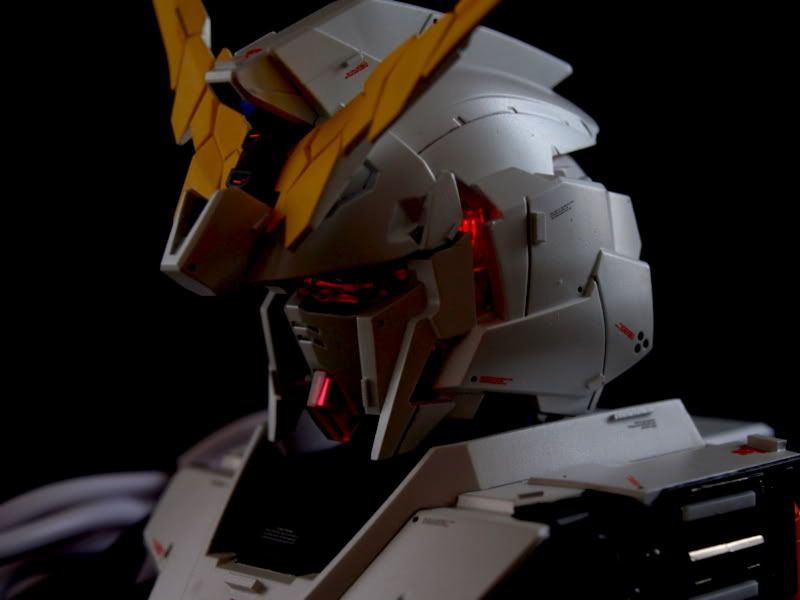
1/48 Unicorn Head - USB Hub

This is a kit built for Ebasenet (http://www.ebasenet.com/) Head Group Build 2011.


The basic concept is to combine these two together:


 Yes, am making a unicorn head into a 4 way USB 2.0 Hub.

*********************************************************************************


So, generally, as expected, there's not much of an action pose :p.

Color: Basically all Gaianote color. The white, like the previous unicorn i did, also knowing the pearl effect will magnify any errors on the surface, I did a flat white with rougher pearl as base coat. After that, I use the finest pearl as finish coat. The effect turns out to be pretty good; at least isn't too much outta my expectation.

Modification: Besides adding in the USB hub, basically all i did was just adding some minor details n some spare parts to cover up places I had sawed off. This is also the main reason why i could do it in quite a short period of time

Well, the thing I afraid the most is whether the hub actually is working or not, after all the cutting, redirecting of wires, changing of LED, masked for spraying of paint etc. Luckily all 4 ports r doing fine.


Overall, this is a pretty fun project, didn't provide much problem as i expected. Hope u guys like it:)