Monday, November 14, 2016

1/1 Ironman Arc Reactor Replica

This is an 1:1 scale Ironman Arc Reactor from Ironman movie. The kit consist of clear acrylic (cut into specific sizes and shapes), various metal screws, brass rings, metal mesh etc. Basically everything, besides the special shape acrylic, can be bought off various electric shops.

I am not really a big fan of Ironman, but i think this looks kinda cool; especially with stand and glass casing, it is actually the one where Pepper gave Stark as a present in the movie.

So here it is. A not so accurate replica (:p) from the Hollywood redition of Ironman.
*******************************************************************************************

Front view: Actually the build is pretty simple. Probably the only time consuming part is the orange color metal wire part; where i need to wrap them individually.

 photo PA140182.jpg  photo PA140184.jpg

Side View:
 photo PA140185.jpg

3 quarter view
 photo PA140188.jpg

Light on!
 photo PA140192.jpg  photo PA140193.jpg

Back view: Actually I wasn't too happy with the wire at the back; the red and black really look too Pasar Road wires.... Will definitely change it if i m gonna to make a ver 2.0 in future.
 photo PA140194.jpg  photo PA140197.jpg

Since I am doing it for someone to be displayed, I think the bright light might be a distraction. As a result, I decided to do a little dimmer control just in case he doesn't like the light to be too bright.

A quick one. Honestly, i admit the dimmer really looks bad.... hahahah, though it does function well.

 photo PA140195.jpg

Before and after (With minimum light) comparisons:
 photo PA140198.jpg  photo PA140199.jpg

******************************************************************************************************************

 photo PA140203.jpg  photo PA140202.jpg


So, that's it. Another project that is pretty fast n fun. I would really appreciate there is any comments to help make it look even better (which I have plan in making a 2nd, upgraded one).

C&C utmost welcome!!

Monday, October 31, 2016

Olgues (aka Huggy), The Doll With Pin

Hahaha, this is certainly a fun project, a in-between filler project after my Graze. It is not plastics, nor resin. Yes, needles and thread this round

Basically it is a sock.

This is what the packaging suggested that can be build into. Ohh..... how cute the little bunny.....
 photo IMG_20161005_223445.jpg

After a few days of my hard work, it's born. Well, it might not be exactly a role model for characters in Hallmark Channel, but i still think it looks kinda adorable....

 photo PA050144.jpg
Left
 photo PA050147.jpg
Right.......
 photo PA050149.jpg


Center.......
 photo PA050152.jpg


Low angle view..... actually basically i have no idea what to shoot and what kinda story i gonna make to make it sounds cool.... whatever.
 photo PA050153.jpg

********************************************************************************

After a few years of owning my digital camera, due to seriously nothing much to shoot for this project, i explored and for the first time, i utilize the build-in filter and after effect system in my phone.

Not bad. Some soft lens overexposed bridal stuff....
 photo PA050165.jpg
High contrast with lots of moise B&W
 photo PA050171.jpg

I am thinking of do one scarecrow in batman....
 photo PA050172.jpg


Somehow i like this effect. forgot what it is called, some tone down decoloration stuff.....
 photo PA050175.jpg

Well, i wanna write C&C welcome, just not sure what to C&C though. this is just a work log of a super carefree, fast, and relaxing project.

Tuesday, October 4, 2016

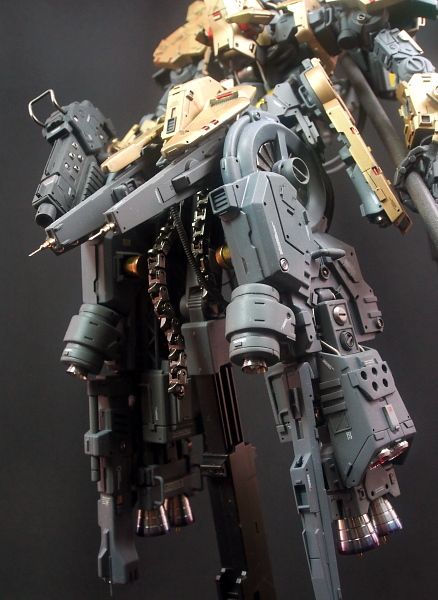
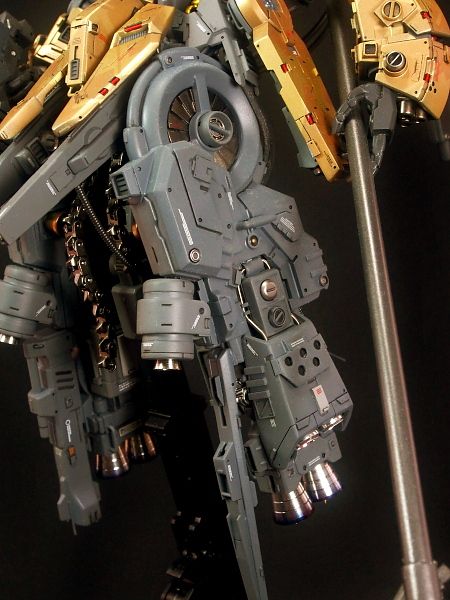
Kronos The Harvester (Graze 1/100 .R) - COTT Build Off 2016

Seriously, I have no idea how this project lasted for 6 months, from March 2016 when I got the kit n officially call it of at end of August ... Anyway, as usual, pictures first, talk later.

Overall:
 photo P9180007.jpg  photo P9180011.jpg  photo P9180010.jpg  photo P9180012.jpg

Overall Upper Body:
 photo P9180015.jpg


Lower Body:
 photo P9180016.jpg  photo P9180017.jpg  photo P9180019.jpg  photo P9180025.jpg  photo P9180028.jpg  photo P9180029.jpg

Left Foot:
 photo P9180030.jpg  photo P9180032.jpg

Part of Front and Back Skirts:
 photo P9180033.jpg  photo P9180040.jpg


Upper Body:
 photo P9180042.jpg

Shoulder & Forearm:
 photo P9180043.jpg  photo P9180044.jpg
 photo P9180047.jpg


Side Skirt:
 photo P9180045.jpg  photo P9180046.jpg

Head:
 photo P9180049.jpg  photo P9180050.jpg  photo P9180051.jpg  photo P9180053.jpg


Long Range Weapon:
 photo P9180056.jpg photo P9180057.jpg photo P9180055.jpg  photo P9180061.jpg

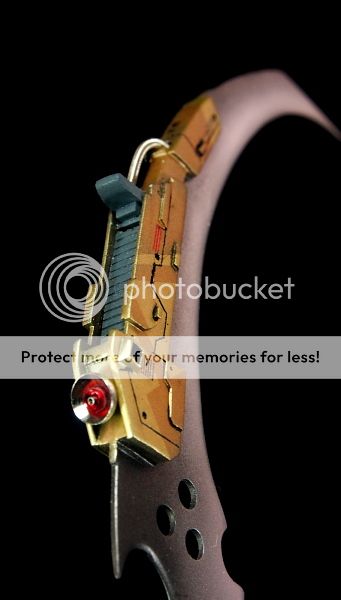
Weapon Scythe:
 photo P9180058.jpg  photo P9180059.jpg  photo P9180060.jpg

Back Skirt:
 photo P9180062.jpg  photo P9180063.jpg

BackBone: (a BIG thank you to Kriz for d idea!! :) )
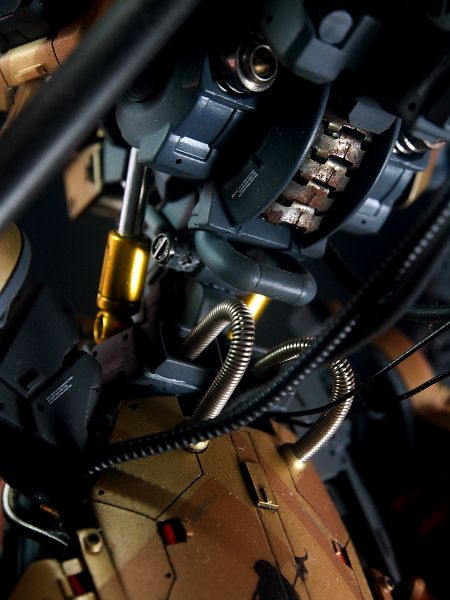
 photo P9180069.jpg

Some other random pictures......

 photo P9180066.jpg  photo P9180067.jpg  photo P9180068.jpg  photo P9180070.jpg  photo P9180071.jpg  photo P9180072.jpg  photo P9180080.jpg

****************************************************************************************

This is a project where i joined the Clash of The Titans Build Off 2016, initiated by Kenny Lim (ToyMaker) & Kelvin Zhang (Mr Dash). The subject is 1/100 Graze from IBO series. Initially was planning to complete it by end May of 2016, which, as usual, deadline is dead, so we gotta make a new one. In the end, i barely completed it by end of August 2016.

Wasn't planning out much for the kit; there r two things i would like to do for this project:
1) Despite i love mecha without feet, i have yet to build one. So this will be the project for that.
2) It is also time to build my first scythe weapon.

Yeah, simple n unambitious as that.

Since the build off is named "Clash of the titans" which to my impression, should be some greek mythology stuff; with a mecha holding a scythe, i just named it as Kronos (Cronus): One of the old Gods, Father of Zeus, the God of harvest.

Oh btw why Kronos? Merely because "K" & double "O" looks cooler than "C" & "U"

For modification, basically just kit bashing . Nothing much to shout about.
Feet- main part if Astray Blue frame's big ass gun
Back skirt - GP01
other stuff are just after market, leftover parts, and modification of both.

Color is the major disaster i encounter.

Initially was trying to get makoto kobayashi's art. It's like burnt metal (which is like a yellowish and darker tone of silver) together with a fade orange- yellow kinda gold (something like champagne gold). The whole thing, in his drawing, looks like all are metallic colors.

- The problem with mixing metallic is, first of all, one cannot see the color in the mixing container; until i really spray them onto a surface.
- Besides that metallic tone consist of metallic flakes and clear color, is very sensitive to the base color it is sitting one.
- Third, even when i got the individual tone looks delicious enough, when i put too colors together, it might looks like some kindergarten project (Well, i have absolute prejudice onto kindergarten kids' work). The tone, the reflective agent, the position of various colors, the visibility of it in different part of the mecha etc etc.

I had spent more than a month, a half pack of plastic spoons (reuse 2~3 times), just trying to get the color combination "right". "Right" doesnt mean what i love,  it just simply means it doesnt look that stupid.

And, for one, professionally i deal with colors, printing.

In the end, i have gone from a camo color scheme which i think is absolutely beautiful and daring, to something safe n "no so ugly". Gold and metallic brown.

And yes, some colors can only exist in 2D paintings and CG drawings.

Well, at least this round i confirm that Gaianotes flatbase is really fine enough to spray onto metallic colors n in a way, u can control the shininess of it. This is something Gunze, which with a much coarser flat base, can't.

C & C are welcome.