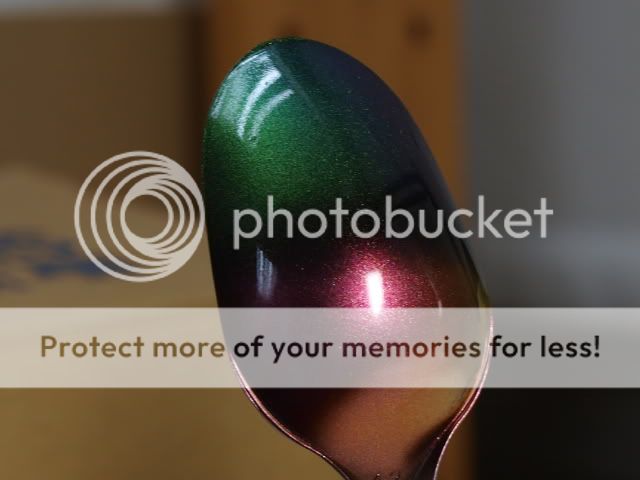
The color of this car: am thinking of a color shifting metallic effect; either a 1 color color shift or a 2 color one.
Paint tested:
1. Alclad's Prismatic paint:

It must be something i m not doing it right. When I spray a very thin layer, the color didn't turn out bright enough. In addition, there's quite some noise spotted.
Second attempt, spray a thicker layer. The duo tone effect's visible, but still think the particle is too large for a 1/24 scale car body.....
P/S: In the photo, it looks like it has one tone of blue only. This is mainly because i m having problem capturing the red tone....
*********************************************************************************
2. Gunze's Maziora:

Again the particle is too large.....
Note that i m testing the paint on a 100% pure black base .

Gloss coated: Effect's slightly better, but still not good enough......


Tested on a second Maziora paint. Effect slightly better n more visible. However, it still have the problem of particle being too large......
(Note: After testing with black background, i tested on some silver reflective background too, which i found that the effect is different; not really suitable for a car body paint, but extremely beautiful for getting a heat stain effect.)
**********************************************************************************
Rim:
For the rim, will not be using any color shifting paint, but am trying to create some color variation within one metallic color. Hence am adding a little clear yellow, n black. Hoping to create an effect that only under strong light, the rim's metallic will bring a little bit a yellow tone; while under normal light, the rim will remain a cool tone of metallic grey.

Final effect: Not as obvious as i anticipated (Almost cannot be captured by camera:()....


**********************************************************************************
Flocking Powder: The making of 1/24 scale carpet
As usual, being a cheapskate, I only have 1 color flocking powder: White! The reason being, with white color powder, i can dye them into anyother color i like; as a result, save money from buying all different color powder.....

KA model: I find this is one of the better ones in market. Very fine powder.

Double sided tape, then sprinkle the powder onto it. Please do not mind the middle part: Cannot see, no going to work on it..... Yes, cheapo + Lazy bum....

Credit to Entau: This is a very useful technique. I lay on the powder first, then, i spray the entire thing; part of the car interior n the carpet (flocking powder) together. The good part about working this way is: first, save time. Second, u will get very close colors for the carpet n the car interior, which is pretty common in real car.
Am pretty happy with the effect! :D
***********************************************************************************
Disaster!!!!!!!
This round, since by coincidence, I found my old, 10-year-old Tamiya grey primer; I decided to prime the whole kit with it. However, seema like the primer cannot withstand very heavy wet coat of lacquer paint n thinner.
The primer has chemical reaction!!!!!


As from the photo, it's very visible there's a patch of "Rashes" on the part. From observation, it's actually cause by the primer: The layer looks like it inflates n there's actually air bubble formed in between layers....

So, there's a dilemma: whether i should strip all the paint n primer, or i shall go ahead with it? Finally i decided to choose the latter, which is the beginning of a nightmare......
So i decided, instead of wet coat the base black, I did mist coat. To further be safe, i even use flat black as base; for flat color tends to get hold onto the base easier....
With 2 layers of mist coat, i will only do a wet coat when i m spraying the layer with pearl powder. Hopefully the already cured base color will serve as a buffer between the primer n the wet coat later.
So does it save me from all the trouble?
I guess the answer is definitely "NO". The photo below is an example of how the primer creates buuble holes when i did the pearl coat (wet coat). 2 layers of black paint seems like not enough to protect the primer......

(Nightmare continues....)

No comments:
Post a Comment