While busy repainting n tackling the problem on the car body, I continue to take some time to continue on other parts of the kit.
Suspension
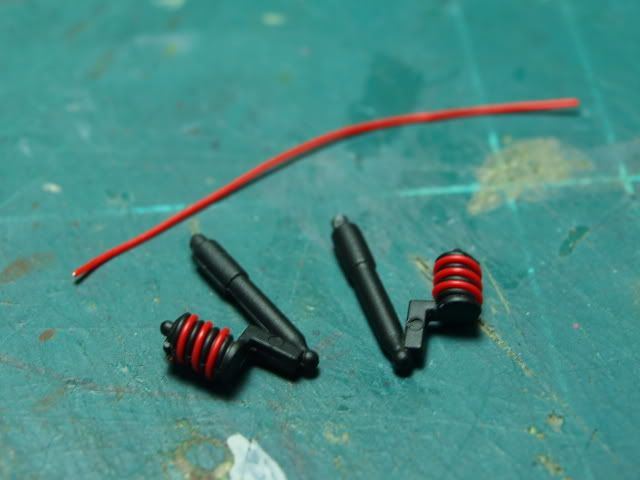
Ok, I m lazy, I admite that.... Instead of scribe off spring on the suspension, I m using a thin wire to wrap around it. The main reason I m doing this is because basically the suspension is not really visible after assembly; basically all I want is some glimpse of other color than the chasis (Black) to create the impression there's a suspension made.
*********************************************************************************
Brake Disc
This is something absolutely new to me; and is one of the high point for me in this build. A metal brake disc. I think the visible real metal color does add up to the overall impression of a plastic model kit. Just love how other modelers r using them. Hence, decided to give it a try in this build.
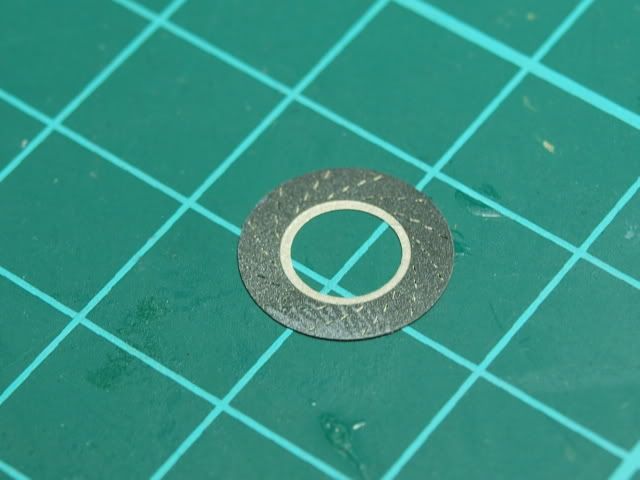
This is a photo etched brake disc. As Entau's pointer, I do agree the original texture of the metal doesn't look nice.

Cut out a small piece of pla plate, screwed tight, n put it on a router. The double sided tape is for the purpose of securing the photo etched piece onto the pla plate.
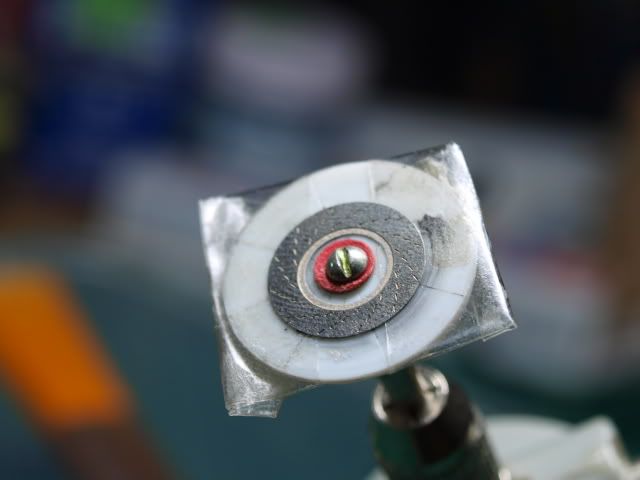
This is how it looks like before I have done anything. All the marking on the pla plate is actually to make sure the photo etched (PE) brake disc is placed in the centre .
Once everything is done, START UR ENGINE & MAKE IT SPIN!!!!!!

With the help of sand paper, I m recreating the texture on the disc, which in real life, is created by the brake pad.
Remark: Learned something here again. Entau was suggesting me to use sand paper of 320 grit or below. However, being cautious, I afraid that grit might to too rough and spoil the whole thing. In the end, i realised due to I m using a finer grit, I need to apply more force n sand it longer. This prove to be a mistake, because the longer n harder we push the sand paper onto the PE part, the easier we will make mistake.
Check out the photo, u can easily see an even force being applied n the texture is not unified.
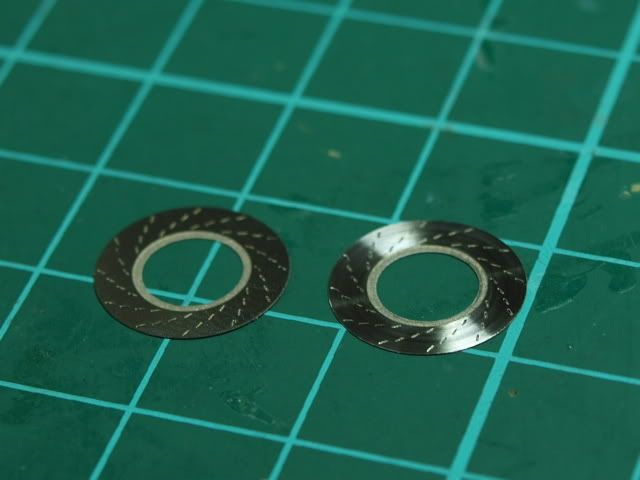
Before & After: Left (Original), Right (After sanding)

Done!!!! I m pretty happy with the result! :)
********************************************************************************
Metal Transfer:
My personal opinion: Metal transfer does add life to a kit, especially car model kit.
Most of my group of friends are actually from Japanese anime based kit modeler, metal transfer doesn't seem to be very popular n well utilized.
My point is, besides car emblem, metal transfer actually can be used creatively; as other option parts in Gundam or other model kits. Below I will show how 2 gunpla modelers (Klay n I) utilize the creativity in Gundam modeling n apply it onto a car kit.

This is how metal transfer decal look like. Basically the shiny parts are real metal, very thin n coated with a self adhesive membrane at the back.

The air cond outlet: The original outlets are pretty ugly. No panel line, not much details neither. I sprayed the light gray first, and hand painted the inside part with enamel dark grey. Since there's no marking, detail, nor panel line, everything's done "agak agak" only.
So I use a ring shape metal transfer piece to cover up the edge. Purpose:
1) to cover up the uneven n ugly border of the light n dark grey.
2) to divert the attention of the viewer "from" the ugly air cond outlet "to" the blink blink metal part.
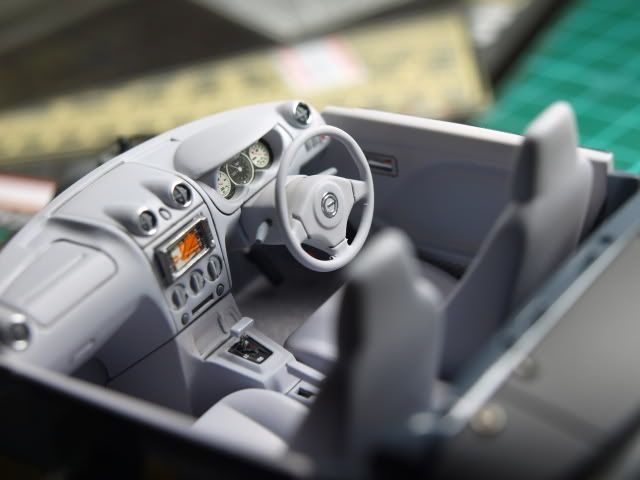
Besides that, there's another small accident happened: The original decal (Ugly, but I had no choice because the steering wheel is really empty) was accidently torn off.
Klay was around in ICW that time so I passed the task to him with just one instruction: "I dont care what u do, as long as I want this steering wheel doesn;t look empty n looks good again" I left it to his creativity.
In the end, he used 2 piece of metal transfer, 1 ring 1 that looks like a "G", put them onto the steering wheel which I think the end result's pretty ok.

That's all for this round. (Go back to the car body again.... Sigh)

Good tips there, bro. Just know that you started a blog.
ReplyDeleteHaha, TQ TQ, just try to record it down here preperly. Thanks for the support.
ReplyDeletewow .....the disc brake is real !
ReplyDelete