Just a little update:
When I first decided to make this into a shoe box diorama, I was thinking of having clear acrylic of glass at the side, not only relying onto lights coming from the front/top panel, so that there ll be more light at the bottom part of the diorama. However I called the idea off as i realised seeing thru the side panel, makes it visually very distracting n complicated.
Therefore I have decided to use frosted mirror at the side, and put some LED as artificial light source.
This worklog is a brief record of how I've done it:
This is basically I plan for the placement of the LED: on the photo frame, shooting the light inwards, reflected by the frosted mirror for a more evenly distributed light.
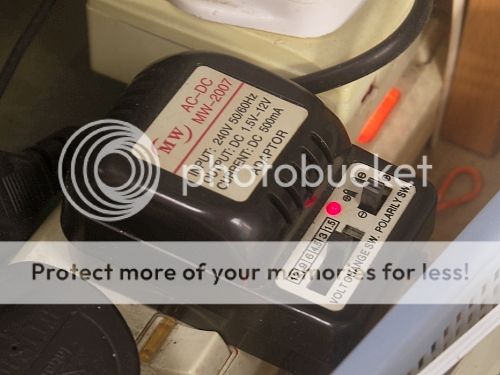
Instead of using dry cell bettery, I decided to use live wire battery with a AC/DC adapter. This is the adapter i use to connect.
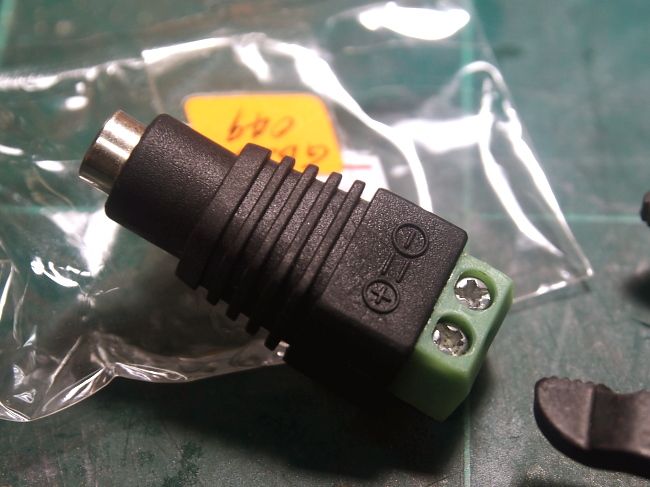
The good thing about this kind of AC/DC adapter. First, it's cheap. Second, adjustable voltage (to control the brightness :p), third, adjustable positive n negative (Huhu)
Good about this kinda adapter is: no need of soldering. a simple screw lock.
Ta Dah!
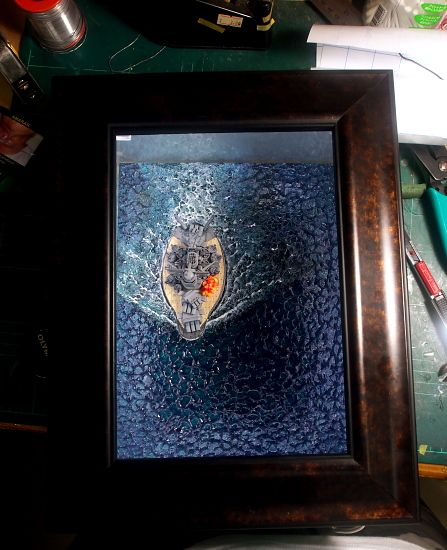
The final result is kinda satisfactory :)
***********************************************************************************************
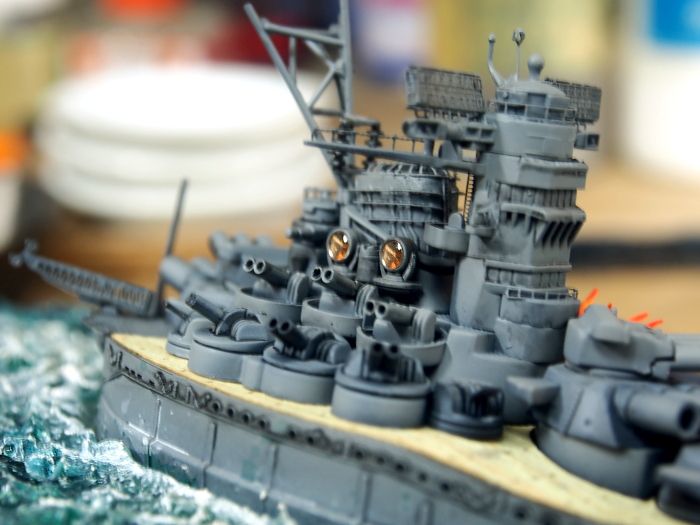
Some random picture that supposed to be posted in the previous update.... heheh
Tuesday, October 27, 2015
Monday, October 19, 2015
SD 1943 Yamato ShoeBox Diorama #1
I have been eyeing on this series of SD kits, from vessels, tanks,to F1, the designs always caught my life. As a result, I decided to try out this kit:
I have used Fujimi's Photo etched set on this kit. Nothing much to mention here coz didnt really took any photo for work log.In short is just attach the PE onto the kit, a simple grey tone.
The main focus of this project is to build a shoe box diorama, with a photo frame, to be display vertically as in the classic arcade game screen shot.
Some simple screen shot
*******************************************************************************************
Some basic color
**********************************************************************************************
The base sea surface: I use Vallejo water effect. As for the waves created by the Yamato, basically is just layer after layer of water effects.
***********************************************************************************************
After about 4 layers, am using enamel clear to create a slightly different tone. overall is slightly more greenish as compared to the deep water.
***********************************************************************************************
Just add a little explosion effect..... looks kinda cacat though.... hoho
*************************************************************************************************
Getting ready the acrylic board for the walls of the shoe box dio. The whole thing divided into 3 layers for the yamato, planes, and various effects. Let's hope the different layers will bring a satisfying result....
********************************************************************************
Subscribe to:
Posts (Atom)