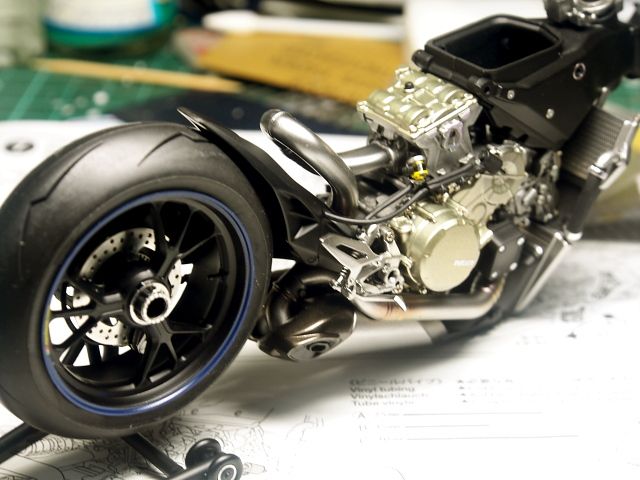
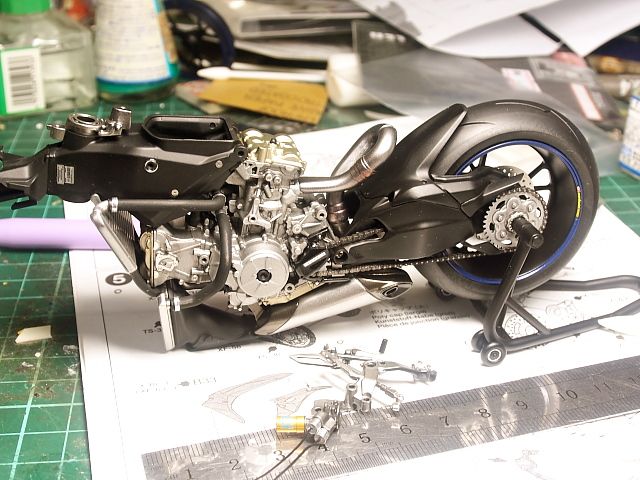
Ok, just photos, since i had taken more.... :p
Naked
Thursday, January 28, 2016
1/12 Ducati Panigale 1199 Group Build
This is a small group build by a bunch of friends who somehow would like to build this Tamiya nicely done kit.
As a result: (Hohohohoh!!)
After 4 months (with one month extension), from October 2016 , finally I would conclude I have completed this project. My previous bike kit is almost exactly one year ago's Zuzuki Gsxr 1000 Hayabusa.
Again, motorbike kit proof to be really a challenge to me, despite Tamiya's has been really good in making excellent kits.
Overall, the kit is just beautiful, simplified in a way which i have no complaint (Maybe except the battery XD), n the accuracy of parts is just top notch. Just that parts are a little too well fit BEFORE painting, which means i gotta sand down many places to make them looser before I proceed to painting.
After painting fitting is way too heart pounding experience to me though, especially doing a clean build, hi gloss somemore, needing to use quite some force to assemble the cowling is just way too scary.
This round I have invested quite a bit in after market, which normally the most i use is one set of PE part, I have used a Tamiya front fork detail-up set, and a top studio photo etch set.
Overall, I think i have done pretty much what i am capable of doing now, though i can easily see there r so much rooms for me to improve on my next build.
Stupid mistakes like mis alignment, losing small parts etc still occur.
Anyway, I am glad i have finally finished this. Not a very good build and i will continue to learn n improve. Any C&C are welcome!!!
For more photos of completed works:
http://rayloke-model.blogspot.my/2016/01/tamiya-112-ducati-panigale-1199-photo.html
For Work in progress photo:
http://rayloke-model.blogspot.my/2016/01/ducati-panigale-1199-wip-archive.html
Tuesday, January 26, 2016
Ducati Panigale 1199 WIP archive
This is a group build of Tamiya nicely made Ducati Panigale 1199. As usual, i do not keep any sort of record during the build. These are more like random photos i took during the process.....
Tamiya official Detail-Up Parts, mostly consist of the 2 front fork and a few parts.
Top Studio Photo-etched parts
Decided not to use Top Studio's full photo etch, for the center piece, i use back the original Tamiya part. At least it provides sufficient strength and accuracy is guaranteed. The top studio on is way too difficult for me to construct.
Initially, I was thinking of using aluminium tube to replace the too-yellowish metal tube provided. As a result, have gotta trim down the diameter of the plastic part. However, scrapped the idea in the end.
Top Studio PE brake disc, however, the tamiya nuts comes in really handy!
These are just some random photos of the engine part. Gold is MrHobby SM02, Stainless Steel -SM03, Flat Aluminium - SM01 silver + flat base (which i think still a little too dark), Semi Gloss Black is Mr Hobby 1500 black surfacer
Chrome parts, done by Alclad II polished Aluminium
The rim decal.... well, i screwed it up. So ended up masked it n spray with the color i like :p
Front brake caliper, was kinda worried about enamel wash because of the very tiny wordings. But it turned out great!
Can't really see the chrome effect at all.... but i kinda like how the clear red turn out...
More random photos.....
For Completed Work photos:
http://rayloke-model.blogspot.my/2016/01/16-ducati-panigale-1199-group-build.html
More photos:
http://rayloke-model.blogspot.my/2016/01/ducati-panigale-1199-wip-archive.html
Tamiya official Detail-Up Parts, mostly consist of the 2 front fork and a few parts.
Top Studio Photo-etched parts
Decided not to use Top Studio's full photo etch, for the center piece, i use back the original Tamiya part. At least it provides sufficient strength and accuracy is guaranteed. The top studio on is way too difficult for me to construct.
Initially, I was thinking of using aluminium tube to replace the too-yellowish metal tube provided. As a result, have gotta trim down the diameter of the plastic part. However, scrapped the idea in the end.
Top Studio PE brake disc, however, the tamiya nuts comes in really handy!
These are just some random photos of the engine part. Gold is MrHobby SM02, Stainless Steel -SM03, Flat Aluminium - SM01 silver + flat base (which i think still a little too dark), Semi Gloss Black is Mr Hobby 1500 black surfacer
Chrome parts, done by Alclad II polished Aluminium
The rim decal.... well, i screwed it up. So ended up masked it n spray with the color i like :p
Front brake caliper, was kinda worried about enamel wash because of the very tiny wordings. But it turned out great!
Can't really see the chrome effect at all.... but i kinda like how the clear red turn out...
More random photos.....
For Completed Work photos:
http://rayloke-model.blogspot.my/2016/01/16-ducati-panigale-1199-group-build.html
More photos:
http://rayloke-model.blogspot.my/2016/01/ducati-panigale-1199-wip-archive.html
Subscribe to:
Posts (Atom)