Monday, November 17, 2014

Noob Tutorial: Converting Battery Powered Display to Wall-Plug Constant Power supplied

Ok, sometimes I would love to have a little electric power gimmicks in my built, especially in dioramas. I have tried normal LED (diode) light, motorized movement, concentrated LED light (looks like a laser pointer).

Normally these builts are mainly for display during events or competition, which I have no choice but to prepare them to be powered by dry batteries; as the organizer would not have approve me using their live wire. However, after the event, usually I ll just take off the batteries for i find the short battery life span and changing of batteries is really not my favorite part.

Hence the idea of converting it into something which i can power it by using a DC converter. With that, I can switch them on anytime without have to leave the battery in it n fear of battery leakage.

In fact, it is pretty simple.

Here I am using a toy UFO Grabber as an example.
 photo P1011001.jpg

First, unscrew and open the bottom of the kit, where all the wires n circuit board are.
 photo P1011002-2.jpg

Dont be afraid of the wires and such. It might looks like there r a lot of stuff, but look carefully, it is pretty straight forward: there is one red wire from the positive of the battery box line to the on/off switch. Another black wire out from the negative. (just ignore the green wire from negative to the switch, it is just a ground wire)
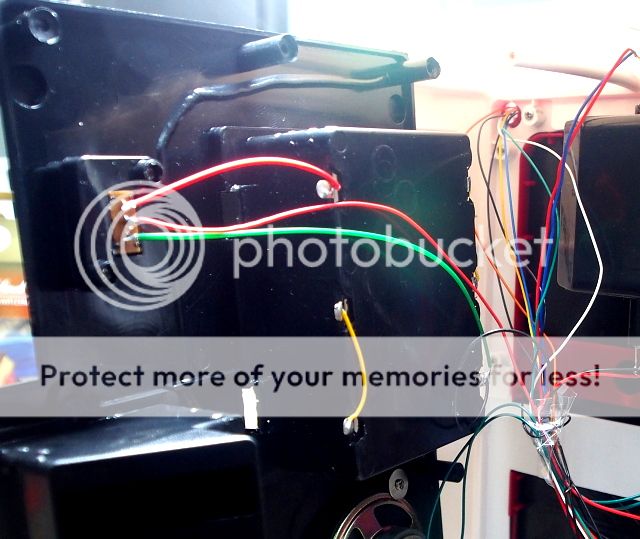
 photo P1011002.jpg
From battery positive: Red
 photo P1011003.jpg

From battery negative: Black wire
 photo P1011004.jpg

On/off switch, one red wire from battery's positive goes in here, and another red wire goes out to the motor and other parts of the kit, to power them. The on/off switch is just to connect & cut off the red wire.
 photo P1011009.jpg

So, what I am going to do is just connect a DC convertor to it to replace the batteries. that's it. simple as that.

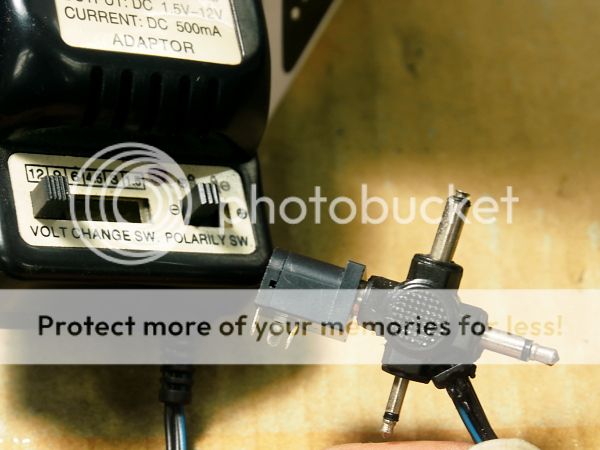
I use this kind of multiple voltage DC converter. It comes with switches for various voltage and even positive/negative. Looking at the original number of battery used, which is 3, (1.5V x 3 =4,5V) I tweak it to 4.5V. Besides that, it also comes with multiple (female) jack.
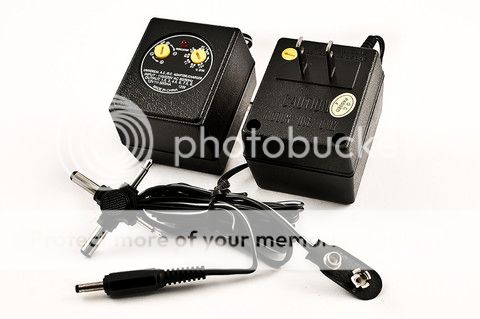
 photo 0005_VX69_large.jpg

This is the first type of male connector.
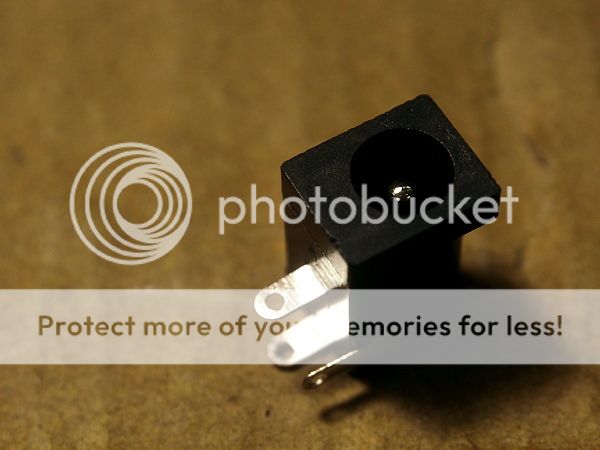
 photo P1011012.jpg

Ok, it fits well.
 photo P1011013.jpg
This is to test whether there s current going thru. Besides that, u can oso use a LED to test the positive n negative. Just make sure you turn the voltage to 3.0v or lesser.
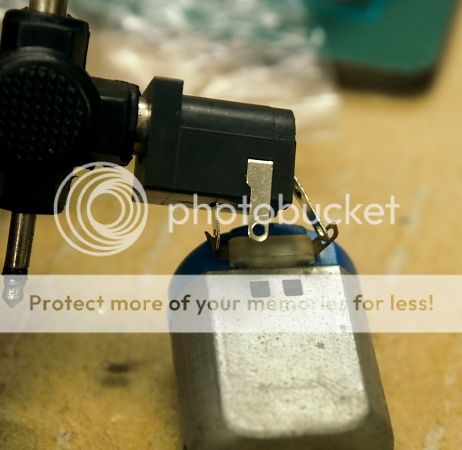
 photo P1011017.jpg

Now, draw the shape onto the exact place where i want to put the connector.
 photo P1011021.jpg
Drill multiple holes, then cut the plastic out.
 photo P1011022.jpg

Ok now secure the connector onto the kit. I use epoxy glue at the back and some pla strip at the front: to cover up any imperfection of the hole i made, and to make the connector more secure.
 photo P1011048.jpg

This is another type. This will be slightly easier as it is round, and it has a ring screw at the back to help secure the connector to the kit. Reapeat the procedure of testing n connecting wires.
 photo P1011026.jpg

Drill a hole, then use a reamer to enlarge the hole.
 photo P1011039.jpg

Like this:
 photo P1011040.jpg

Example: done.
 photo P1011043.jpg


The third type. This is even easier. It comes with connector by screwing the wire tight. So there is no soldering needed at all.
 photo P1011028.jpg  photo P1011029.jpg

Done. Simple as that.
 photo P1011032.jpg


The fourth type.
 photo P1011027.jpg

It needs soldering, as u can see after open up, there's a positive n negative point. However, as compared to the 3rd type, the wires are well hidden and it looks a lot more tidier.
 photo P1011034.jpg  photo P1011035.jpg

The good thing about the last 2 types is u only need to use pin vise to drill a small hole, as large as the diameter of the wire would do.
 photo P1011037.jpg photo P1011038.jpg

Ready to connect
 photo P1011036.jpg

Although there r altogether 3 connectors, and 6 wires, all the 3 reds i connect them into one red. while black i do the same thing. Pardon me for the lousy tape used. Just for photography purpose for this wip sharing.

At last the 2 wires goes to the positive n negative point of the battery casing.
 photo P1011042.jpg


Overall view. This is due to i m doing this introduction to various connector. Normally u just need to make one connector.
With this, i do not have to install batteries but just connect it to a DC converter and whenever I need to switch it one, it will be just very easy.
 photo P1011046.jpg  photo P1011047.jpg

Just a little noob sharing. :)

Tuesday, November 11, 2014

Electroluminescent Paint

Was talking to Adrian last night and he mentioned about this electroluminescent paint. I only knew about electric conduct paint but not this.

Basically it is a paint that not only conduct electric, when it does, the paint actually luminate!!!! How cool that will be to apply on modeling!!!!

I went on checking it out and somehow I found 2 American companies that do something like this: LitCoat and Luminlor; the brand. Seems like lumilor is more catered for airbrushing. Now I just need to find a way to get hold of this to see how thick it is n such.

Let's hope ICW manage to get a hold of this soon!!!


This is a video demostration by that company. The + & - is already connected. while he is spray more coating on it, the electric circuit become complete and it starts to glow! I think it's really COOL!!!!!


Monday, November 3, 2014

BJD Project - Test Subject #1

This is a simple wip, basically a test subject for BJD doll makeup test.

For this round, I will not do any air brushing onto the subject. Instead, just use color and the natural resin color to achieve the effect I want. Besides that, this is the first time almost 100% I will use real make up material for the test project.

************************************************************************************************************************

This is the extra head I bought, relatively low price due to it's a considered a defect product. The size and shape is considered a "Baby" or "cartoonish" head: as in the head & eyes are relatively large, while the nose, lips, and chin is relatively small.

A typical "Big eye".

 photo P1010579.jpg

Eye brow pencil and cotton bud to lighten n smoothed the lines. I realised the eye brow pencil seems like contain some sort of oil based filler/binder.
 photo P1010581.jpg


Eye Shadow. This is the cheapo eye shadow I bought from Daisho
 photo P1010623.jpg  photo P1010625.jpg


Cheek Powder - I bought from Fun n Cheer, the shop that sells China-made low cost products
 photo P1010630.jpg

After basic eye shadow and blusher.
 photo P1010585.jpg  photo P1010586.jpg

This is one of the eye lashes I bought. At first I was thinking of using human size eye lashes but found that the backing material is way too hard to bend. Hence, no choice but to buy BJD specific ones. a very soft type.
 photo P1010587.jpg

Super glue!!
Btw, I realise after some careful trimming, it will look more natural on the doll, especially it is a lighter make up one.
Effect after trimming.
 photo P1010593.jpg

Failed. The middle part came off. Guess I was pulling too hard n there's too much tension. :(
 photo P1010588.jpg

Also trim off slightly more at the part nearere to the nose, while the outer part, I keep them slightly longer. This is crucial since i m not applying any mascara or color enhancement.
 photo P1010592.jpg

Now, the eye. I have the largest size of 18mm eye ball(luckily I bought for the "just in case" reason). The holes for the eyes are super big!!!! Even with a 18mm eye ball, there r places where the eye ball cannot cover.
To minimize the effect of having a "hole", i m using this children soft clay: Manage to get one (again in Daisho! XD) named "salmon pink".

 photo P1010621.jpg

Ok, not too bad.... Btw, I use blue tag to hold the eye ball onto the inner part of the head/face.
 photo P1010595.jpg

Next, am thinking of some ear rings. I have choices of small or dangling ones. I decided to make a slightly bigger ones. Just for testing.
First, decide the hole, and drill.
 photo P1010633.jpg  photo P1010632.jpg


I m using this papre clips as I think the chrome really is convincing as silver. Besides that, it saves me some time on bending some perfect round ear rings. Just use a cutter to cut off the unwanted part.
 photo P1010624.jpg  photo P1010631.jpg  photo P1010634.jpg

After that, use this: Nail art diamond-like stickers. This is mainly i realise to find a scale down diamond thingy is not as easy as I thought. Human size, smallest one, will still look a lil too big.
 photo P1010626.jpg

A small deco on the nose :)
 photo P1010636.jpg

**********************************************************************************************************

With hair. Ok, This is just a test subject, so nvm the clashing og the color in make-up and the hair color.... huhu, is really not my cup of tea though. Using this duo tone hair fur-ball, is just to test doing the layering for the hair.
 photo P1010638.jpg  photo P1010667.jpg  photo P1010657.jpg  photo P1010644.jpg

****************************************************************************************************************

Since I have prepared a few sets of clothing for Annabelle, I think i would just prepare a small cupboard for her clothings too. XD
Wood is pine wood from Daisho.
 photo P1010598.jpg 
Tested with a wooden hanger.
 photo P1010599.jpg  photo P1010602.jpg 

Cloth hanger.
 photo P1010604.jpg

Annablle's clothings. I realise I mostly get her jackets n coats, merely one dress. This is basically I would prefer to hide her joints. Same reason for the boots instead of normal high heels, which means her ankle joint will be hidden too.
 photo P1010609.jpg  photo P1010611.jpg  photo P1010612.jpg  photo P1010607.jpg photo P1010616.jpg

Basically, that's it. Now, it's time for the main subject!!! XD