For people who doesnt have much time or the luxury of painting their kits, snapfit probably is the only way they could do with the kits. However, making a snapfit kit to look good require a different set of skill from the normal painted kit.
One of the main challenge of snapfitted kit is the task of removing nip marks, without leaving any visible leftover mark. This is especially challenging when doing colored parts; especially blue n red, n other darker colors. One can sand under the nip mark is flat, but is during the cutting process, any damage on the plastic will leave a white spot on the plastic which is almost impossible to remove 100%. So be very careful!

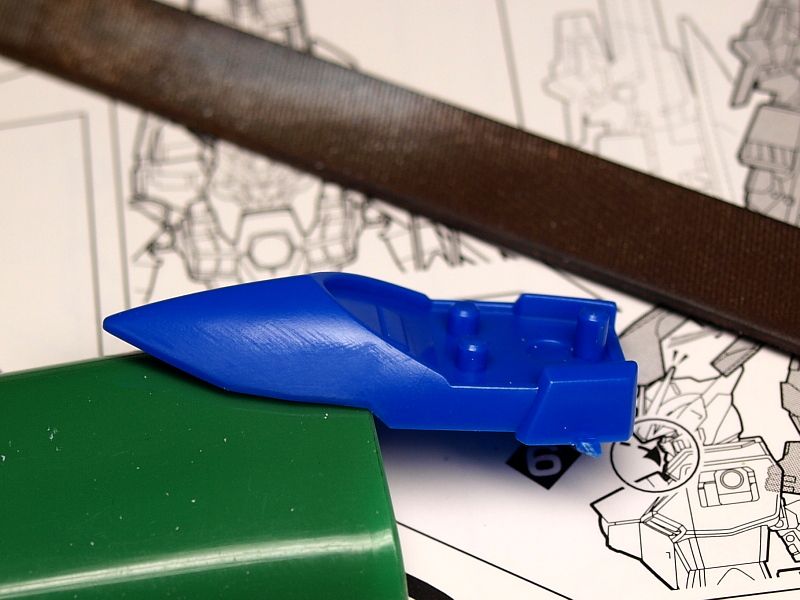
Parts on runner. carefully search an angle so your cutter wont cause any damage onto the part.

Use cutter to cut the part out. Remember to cut a little further away from the part.

u can use a knife to trim the nip shorter. Warning: "slice" the nip slowly, layer by layer. Do not chop! It might cause the plastic to turn white when it's distorted by force.

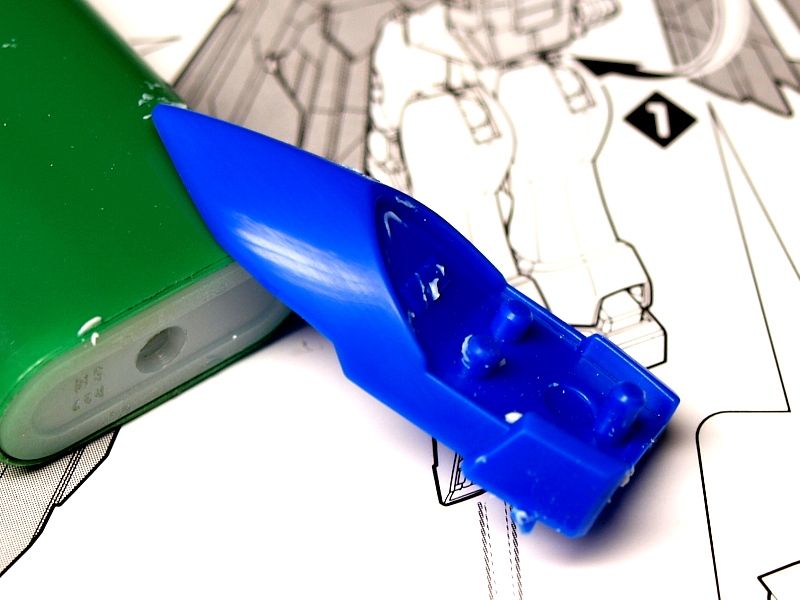
My personal preference: i use a file to sand down the remaining, leaving just a tiny bit on the plastic. This is faster than using only sand paper. but dangerous part is, the file might cause scratches too deep beyond repair.
Lightly sand with file. As u can see, even i sand very light force, there r many rough scratches on the part.

Then i sand with sand paper. start with grit 800, then, 1,000 , and end by 1,200. If u want even finer touch, end with 1,500 or 2,000 grit. Because this round i will be flat coating it, so i stop at 1,200.

Compound: I use Tamiya compound: coarse. To me, this feels like sandpaper grit of 2000, 3,000.. It's just like sand paper in cream form. Use a soft microfiber cloth to compound, just like polishing your car.

End result: Of course it's not really mirror finish, but gloss enough. under micro lens of a camera, check out the original plastic glossiness of Bandai's plastic (Photo below):

***************************************************************************************************************************************************
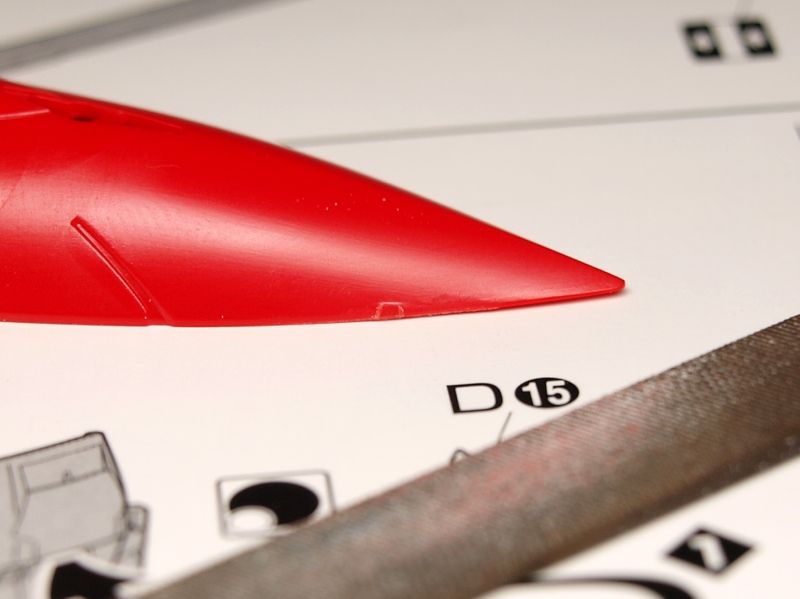
This is the same process: but on a red color part:


No comments:
Post a Comment