Unicorn Head WIP #1
One day, I was just thinking what happen when these 2 combined?
**********************************************************************************
45minutes later.........
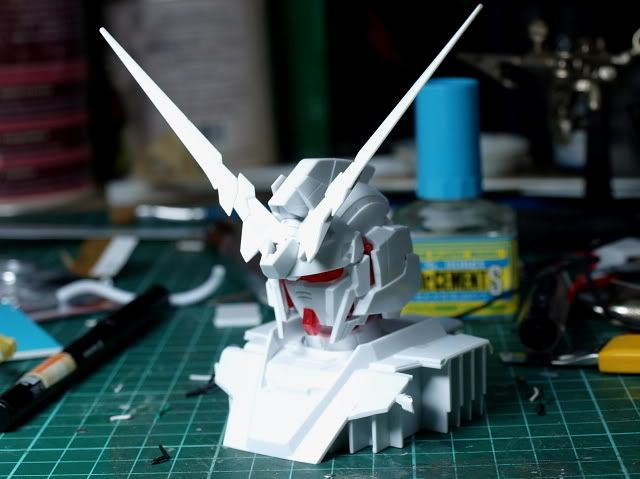
Snapfited the head: Looks smaller than I expected, but overall build is pretty good; almost 90% similar to MG.
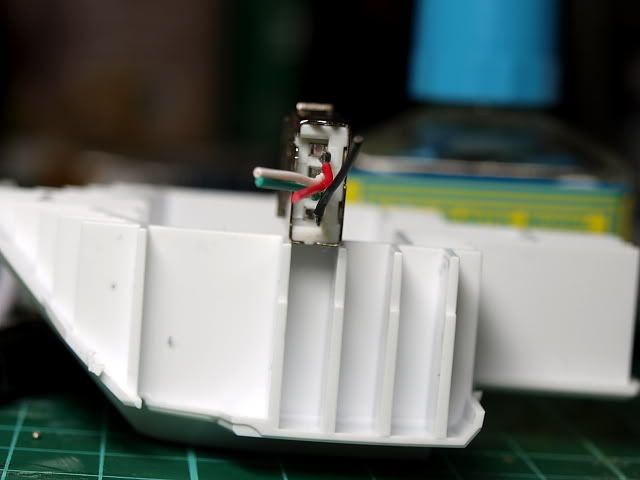
Put the base upside down, it's pretty spacious where a small circuit board should have no problem hiding inside.
Was deciding how the USB female port should be placed, either horizontal or vertical....
Finally decided to line them up horizontally. So it's time for some chopping n sawing.....
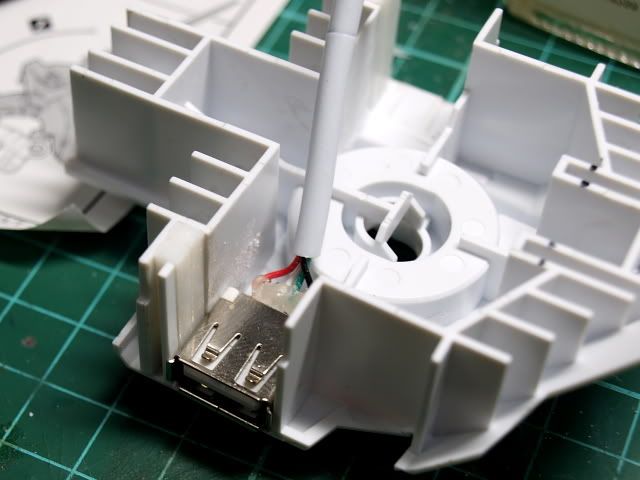
Test fit. Realised I need to sand down one of the inner wall n add some pla plate to fill up some of the empty space. Finally it fits. :)
Just add some pla plate to fill up gaps in between the 2 inlet. Later will add more details.
***********************************************************************************
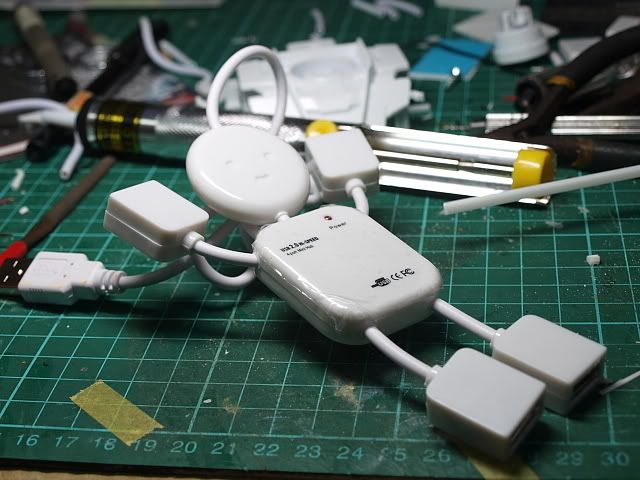
Circuit board time.......
Mr Lelo is looking good... (I can't help but give him a name... Pretty cute USB hub....)
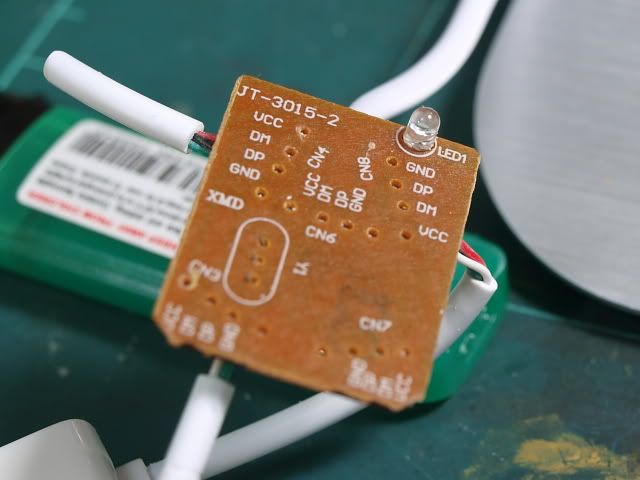
Time to strip the bugger off. Muahahahahaahah...... The circuit board is smaller than I expected, which is a good thing.
Try the circuit board. It fits so well that it really surprised me! Overall just need to chop off 2 parts and the entire circuit board fits nicely into the inner chest.
The USB hub comes with a small light, lit by an LED. The light source is extremely weak and it's in green color. So weak I even have hard time to capture it using camera. Since the psycho frame color of the Unicorn is red, I will change the LED to a red one.
Ok, LED changed. Now check whether the circuit board still working or not. This is because Red LED n Green LED have different voltage, n since I didn't change the resistor on the circuit board, is better I double check (Although the chances of frying the circuit board is slim because 1) Red LED uses lesser voltage than green ones, meaning less burden for the resistor. 2) although they use different voltage, the difference is basically very small, within the variantion of 1V)
I tested the board by connecting all the ports to an USB mouse. Yes, everything's fine, the mouse optical lens is working!!!!
Now test on the head; the light seems a little stronger than I would like it to be. Later will find ways to make it dimmer.
***********************************************************************************
Installation Process
Basically since it's very easy to damage the circuit, I decided to seal up the base before spraying paint. Hence I gotta think of the easiest way for assemble.
Drill holes on the neck part for the wire to go thru into the head.
Seems like everything's fine. I m luckier than I thought :p
**********************************************************************************
More or less is done. Next step would be painting....... (To be continued. Hopefully I m not too lazy to snap photos.....)


Boss , will this mass produced under ICW brand ?
ReplyDeletePre-order 2 tks !
haha .. real nice & good idea ! :D