Friday, March 27, 2015

Tony Tony Chopper GB: Robo No.5 Chopper Crane

Actually this is a gift I got from Siew Kong during our Christmas present exchange in 2014 Christmas /New Year party.

This is one of the 5 Chopper Robo series where the five different machine can combine with each other to form another machine; while all 5 can also combine into one huge machine/robo. Overall the build is something like a nice box of SD: typical Bandai easy snapfit and while there some parts separation, there'r quite some masking work needed. Something I am really bad at!

Ok, there'r some of the photo for this 3 week built. Will upload more photos for after 合体。


 photo poster-1.jpg

 photo P1011416.jpg

 photo P1011417.jpg

 photo P1011426.jpg
 photo P1011422.jpg
 photo P1011428.jpg
 photo P1011420.jpg
 photo P1011430.jpg

Monday, March 2, 2015

Confession of a NOOB!!!!


Ok, confession: Hahahaahah!!!!!


1) Torn Decal: Basically the decal is old. I have tried some small part, n found it cracks. Thinking of the cracking isn't severe i decided not to use any decal rescue fluid.
When I apply the decal, the big piece cracked into 3~4 pieces, still manageable. Manage to make them pretty much perfect.
However, since the decal is old, which the glue would be weak, i decided to apply a little Mark setter, which consist of some adhesive in it besides melting the decal, n let the fluid sip underneath the decal.
The decal started to CRACK!!!!!!
The worst thing is, the decal is already soft at that time, which i cannot re-adjust the decal anymore!!!!!
 photo mistake - 8.jpg


2) Wrong sequence: the original plastic brake disc comes with pegs, which makes it quite durable. However, the photo etched brake disc doesn't, and only glued to the rim with 5 tiny points. I should have insert the wheel into the spokes, then after that only glue the  brake disc.
Since i terbalik the sequence, the brake discgot detached, n i gotta re-glue it onto the rim, which super glue on top of super glue, the brake disc is extremely fragile now..... DUH!
 photo mistake - 7.jpg


3) Gap!!!! The front connects to the main body through a male peg from the main body n the female peg on the front light. I didnt make preparation to make sure i have more flexibility when i final assemble the parts. As now, due to my mistake, I m not able to adjust anymore, n as a result, an ugly gap!
 photo mistake - 5.jpg


4) THIS IS EMBARASSING!!!!!!! Seeing how difficult n risky to take out the wheel again, I decided to ..... just leave it as it is!
 photo mistake - 6.jpg


5) Again, NOOB mistake of not doing preparation work. Forgot about the force that might incurred after the parts with multiple layer of coating.... Seamline cracked.... T.T
 photo mistake - 2.jpg


6) Old Metal Transfer................... Old old old..... Inititally was ok, but things got crazy when i apply wax n use cloth to wipe. Decided to leave it. T.T
 photo mistake - 3.jpg


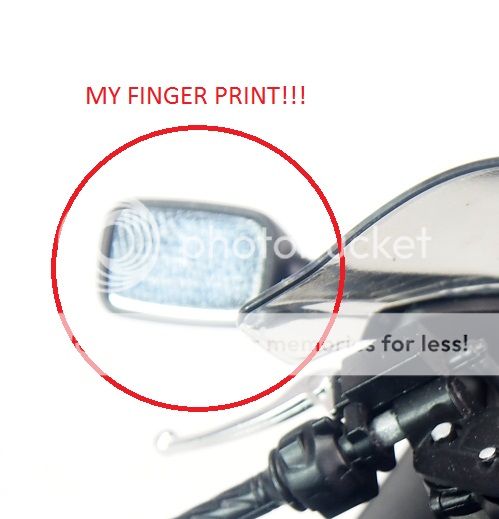
7) Simple as this is..... glue mark!!!!!!
 photo mistake - 1.jpg  photo mistake - 4.jpg

BBSTC Two Wheeler Group Build - 1/12 Suzuki Hayabusa GSX 1300R

This is an old kit I bought n had been wanting to build but just got delayed. Now, am using this build to join BBSTC's Two wheeler Group Build
BBSTC (Big Boy Small Toy Club) link
Two Wheeler Group Build Event Page

Ok, as usual photo first, talk later. (especially when I am gonna share all the noob mistakes i made in this project :p


Just that when I went downstairs of ICW to take some outdoor picture, suddenly it turn dark n start raining. Hence, really bad lighting.... (The rain stopped when i moved everything upstairs... duh!)
 photo P1011230.jpg  photo P1011233.jpg  photo P1011229.jpg
************************************************************************************************************************
 photo P1011267.jpg  photo P1011280.jpg  photo P1011254.jpg  photo P1011246.jpg  photo P1011235.jpg

Somehow I really love the photo etch effect for the radiator....... though it's so hidden, I just can't help to shoot a photo of it :p
 photo P1011283.jpg  photo P1011270.jpg

Tamiya's chrome part is just beautiful!!!
 photo P1011271.jpg  photo P1011265.jpg  photo P1011259.jpg  photo P1011256.jpg

Should have gloss coat the speedo meter.
 photo P1011247.jpg  photo P1011246.jpg  photo P1011245.jpg


Beautiful Chrome!!!! So many people praise about how beautiful i made the frame..... which i have to tell them it's original Tamiya chrome!
 photo P1011243.jpg

At first i thought the gold photo etch would look weird, but actually it looks good n it actually ease my work so much.
 photo P1011242.jpg


********************************************************************************************************************
Here are some photos without the cowling:


 photo P1011169.jpg  photo P1011167.jpg  photo P1011162.jpg  photo P1011204.jpg  photo P1011196.jpg  photo P1011183.jpg  photo P1011188.jpg  photo P1011209.jpg  photo P1011195.jpg  photo P1011215.jpg  photo P1011207.jpg

Huhu, just try out some filter mood shot XD
 photo P1011216.jpg

*****************************************************************************************************************************
Basically, I must say Tamiya had done a really good job! The fitting is almost 100% flawless, chrome parts are as beautiful as it could gets, & assembly design is just way too friendly!

However, due to a long time I have not been doing motorcycle, and pretty much underestimate the difficulties m special care needed for such kits, I have made it a not so smooth process... XD

Basically, it is pretty much an OOB project. I have just done a little bit of detailing with metal transfer rivet, a few pieces of photo-etched parts, try on wrapping the seat with a fake leather sticker, and change the suspension spring. Other than that, just follow the instruction n spray.

The link for wip : tamiya-112-suzuki-gsx1300r-hayabusa-wip.html

I think this round it is more interesting in sharing all the stupid mistakes i had made. Because there r so many of them, i have had posted an entire blog post about it.
Confession of mistakes i made here : http://rayloke-model.blogspot.com/2015/03/confession-of-noob.html