Wednesday, April 8, 2015

MITEAM: Zero1st

* MITEAM: A short form of the phrase " Modeler IThe Eyes of A Modeler". This is just a simple blog based on my personal view to pay tribute and respect to fellow modelers who i know as personal friend.

Name: Shermen Lim

Pseudonym / Nickname: Zero1st

Usual Genre: Gunpla, Sci-fi, Resin Figurine

Description: No doubt, this is, if not the best, is one of the highest technical advance modeler in my regular ring of modelers friends. In Gunpla modeling and community, he is my senior.

When you look at his photo album, either in his photo hosting site, or social media, you will notice he has so much more of his wip photos than his completed built ones. This clearly shows that he is definitely a technical guy. The one thing that impress ( and shock) me most is his ability to modify to join parts so seamlessly that those parts are just tight enough to hold themselves yet can be seperated out again anytime; meaning, he assemble his work without glue: merely by the clever calculation n building of perfect joining. With this, one will have no doubt, he is too, i would consider the best articulation modifying modelers among our group of
friends (just look at how he'd made an SD pose so handsomely). That actually blew my mind!

Zero1st is a veteran is ACG, especially in mecha anime/manga, with great interest in, which help him develop really good design sense in mechanical design. As a result, with his great design and his modification skill, he has never failed to create something stunning , and can be considered as classic for those designs would still be referenced, copied, after many years.

In terms of fundamental works, he, too, produce top notch finishing kits: his clean build often considered as almost perfect kinda finishing. For weathering, maybe it looks a little weaker, only when compared hand in hand, with his own clean build work; but my opinion, is already somewhere top in Gunpla genre.

As for consistency, patience, and ability & willingness to push ownself further, Zero1st is also one of the modelers who i have met is so, so dedicated to this hobby. No doubt about it. He has always shown that he is ready to get outta his comfort zone and push himself even further.
Zero1st has been in Bandai's official competition many times, and won numerous prizes. For a modeler with such technical skill, redesigning ability and dedication in the hobby, I think it is a pity he hasn't gone to the top spot on the podium yet. For me, he has so much potential n he deserves to be there. I used to ponder over this matter and there are a few things I realized I couldn't ignore about it.
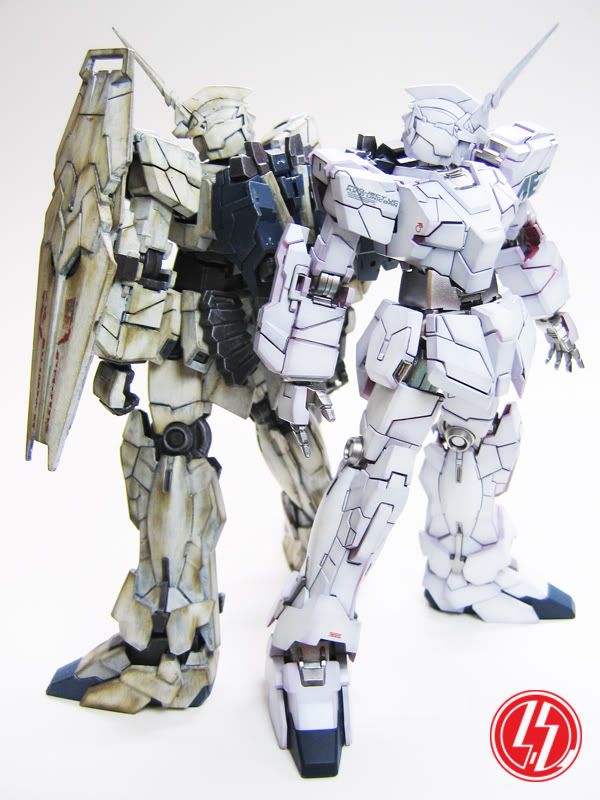
 photo z1st unicornw022 1.jpg         photo z1st 1383201_216046661903760_1777221628_n.jpg         photo z1st 1382914_216026111905815_636556164_n.jpg photo z1st 1390742_218848724956887_814586682_n.jpg photo z1st 11010528_446476908860733_4038591257329491806_n.jpg


PRESENTATION OF WORK
Besides that, probably I ll add, the urge in winning!  Ok, i am not saying Zero1st is a saint, well, looking at his nickname as Tissue man, yeah he is no saint.  XD

Zero is a person with taste n art sense very much shaped by Japanese ACG. Although Bandai's BAKUC or GBWC, is an event closely linked to ACG culture, we can't deny that everything Bandai, as a business entity, does, is not very ACG. In fact, everything is just commercialized, business that is.
So when come to judging, whether the odl judges apponted by Bandai, an local or Bandai's SEA staff, non actually put too much emphasis in how it suits well in ACG culture. In fact, they r more concern about how the competition piece, which they have dumped in substantial amount of money, do attract the general public; in all irony, non ACG people.

So working on a scene in a Gundam anime? No. Doing modification that requires no explanation to veteran anime kaki but general public has no idea WTH is that? Big no no.

Does Zero actually knows about this? I would say being an intelligent young man, I have no doubt he does. However, often, his love about presenting something he wants to express, exceed the commercial or purpose-driven consideration that he would have to do in order to gain him more
advantage in competition. In short, he choose to build and present something he wants the world to see more than standing on the podium; if there r the only two choices he had.

During wip phase for year end compy project, there were quite a few times i asked myself why this f*cker is so f*cking stubborn? (Hahah, i used such words to express my frustration at that moment :p) However, after knowing him for longer time, that actually earns my respect, so much of them! True, as a friend, we wish to help our friends to achieve something "we believe is best" for them, but we often forget to realize what is the thing they really want.

So,i expect to see this most-technically-skillful friend of mine, to continue push himself and blow my mind!

Just a side note though: If one day he decides to go with the flow, and make the best out of the judging limitation, my advice to him will be: Look at the design Bandai does "IN" the anime vs the design Bandai does "FOR" ( to promote) the anime. The direction for your built should be as what Bandai does "FOR" (promoting) the anime.

Website: Do check out his Facebook Page of Zero!st FB page (https://www.facebook.com/Zero1st.ver) There are so many WIP photos adn one can really learn some tips n tricks in modification!!!! Serious solid skill!

Or Forum: www.pla-zone.com

 photo z1st 1379521_216059751902451_726100297_n.jpg photo z1st 1394460_216007888574304_1031017985_n.jpg photo z1st 1375649_216039071904519_1921417393_n.jpg photo z1st 1377348_216020881906338_24992585_n.jpg photo z1st 1379246_216028855238874_42289742_n.jpg

Friday, March 27, 2015

Tony Tony Chopper GB: Robo No.5 Chopper Crane

Actually this is a gift I got from Siew Kong during our Christmas present exchange in 2014 Christmas /New Year party.

This is one of the 5 Chopper Robo series where the five different machine can combine with each other to form another machine; while all 5 can also combine into one huge machine/robo. Overall the build is something like a nice box of SD: typical Bandai easy snapfit and while there some parts separation, there'r quite some masking work needed. Something I am really bad at!

Ok, there'r some of the photo for this 3 week built. Will upload more photos for after 合体。


 photo poster-1.jpg

 photo P1011416.jpg

 photo P1011417.jpg

 photo P1011426.jpg
 photo P1011422.jpg
 photo P1011428.jpg
 photo P1011420.jpg
 photo P1011430.jpg

Monday, March 2, 2015

Confession of a NOOB!!!!


Ok, confession: Hahahaahah!!!!!


1) Torn Decal: Basically the decal is old. I have tried some small part, n found it cracks. Thinking of the cracking isn't severe i decided not to use any decal rescue fluid.
When I apply the decal, the big piece cracked into 3~4 pieces, still manageable. Manage to make them pretty much perfect.
However, since the decal is old, which the glue would be weak, i decided to apply a little Mark setter, which consist of some adhesive in it besides melting the decal, n let the fluid sip underneath the decal.
The decal started to CRACK!!!!!!
The worst thing is, the decal is already soft at that time, which i cannot re-adjust the decal anymore!!!!!
 photo mistake - 8.jpg


2) Wrong sequence: the original plastic brake disc comes with pegs, which makes it quite durable. However, the photo etched brake disc doesn't, and only glued to the rim with 5 tiny points. I should have insert the wheel into the spokes, then after that only glue the  brake disc.
Since i terbalik the sequence, the brake discgot detached, n i gotta re-glue it onto the rim, which super glue on top of super glue, the brake disc is extremely fragile now..... DUH!
 photo mistake - 7.jpg


3) Gap!!!! The front connects to the main body through a male peg from the main body n the female peg on the front light. I didnt make preparation to make sure i have more flexibility when i final assemble the parts. As now, due to my mistake, I m not able to adjust anymore, n as a result, an ugly gap!
 photo mistake - 5.jpg


4) THIS IS EMBARASSING!!!!!!! Seeing how difficult n risky to take out the wheel again, I decided to ..... just leave it as it is!
 photo mistake - 6.jpg


5) Again, NOOB mistake of not doing preparation work. Forgot about the force that might incurred after the parts with multiple layer of coating.... Seamline cracked.... T.T
 photo mistake - 2.jpg


6) Old Metal Transfer................... Old old old..... Inititally was ok, but things got crazy when i apply wax n use cloth to wipe. Decided to leave it. T.T
 photo mistake - 3.jpg


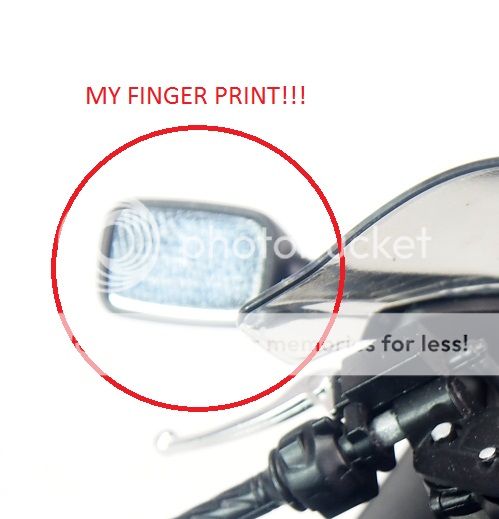
7) Simple as this is..... glue mark!!!!!!
 photo mistake - 1.jpg  photo mistake - 4.jpg

BBSTC Two Wheeler Group Build - 1/12 Suzuki Hayabusa GSX 1300R

This is an old kit I bought n had been wanting to build but just got delayed. Now, am using this build to join BBSTC's Two wheeler Group Build
BBSTC (Big Boy Small Toy Club) link
Two Wheeler Group Build Event Page

Ok, as usual photo first, talk later. (especially when I am gonna share all the noob mistakes i made in this project :p


Just that when I went downstairs of ICW to take some outdoor picture, suddenly it turn dark n start raining. Hence, really bad lighting.... (The rain stopped when i moved everything upstairs... duh!)
 photo P1011230.jpg  photo P1011233.jpg  photo P1011229.jpg
************************************************************************************************************************
 photo P1011267.jpg  photo P1011280.jpg  photo P1011254.jpg  photo P1011246.jpg  photo P1011235.jpg

Somehow I really love the photo etch effect for the radiator....... though it's so hidden, I just can't help to shoot a photo of it :p
 photo P1011283.jpg  photo P1011270.jpg

Tamiya's chrome part is just beautiful!!!
 photo P1011271.jpg  photo P1011265.jpg  photo P1011259.jpg  photo P1011256.jpg

Should have gloss coat the speedo meter.
 photo P1011247.jpg  photo P1011246.jpg  photo P1011245.jpg


Beautiful Chrome!!!! So many people praise about how beautiful i made the frame..... which i have to tell them it's original Tamiya chrome!
 photo P1011243.jpg

At first i thought the gold photo etch would look weird, but actually it looks good n it actually ease my work so much.
 photo P1011242.jpg


********************************************************************************************************************
Here are some photos without the cowling:


 photo P1011169.jpg  photo P1011167.jpg  photo P1011162.jpg  photo P1011204.jpg  photo P1011196.jpg  photo P1011183.jpg  photo P1011188.jpg  photo P1011209.jpg  photo P1011195.jpg  photo P1011215.jpg  photo P1011207.jpg

Huhu, just try out some filter mood shot XD
 photo P1011216.jpg

*****************************************************************************************************************************
Basically, I must say Tamiya had done a really good job! The fitting is almost 100% flawless, chrome parts are as beautiful as it could gets, & assembly design is just way too friendly!

However, due to a long time I have not been doing motorcycle, and pretty much underestimate the difficulties m special care needed for such kits, I have made it a not so smooth process... XD

Basically, it is pretty much an OOB project. I have just done a little bit of detailing with metal transfer rivet, a few pieces of photo-etched parts, try on wrapping the seat with a fake leather sticker, and change the suspension spring. Other than that, just follow the instruction n spray.

The link for wip : tamiya-112-suzuki-gsx1300r-hayabusa-wip.html

I think this round it is more interesting in sharing all the stupid mistakes i had made. Because there r so many of them, i have had posted an entire blog post about it.
Confession of mistakes i made here : http://rayloke-model.blogspot.com/2015/03/confession-of-noob.html